Friday, December 30, 2011

It's Citrus Season


It's citrus season here in California, and we have lemons, oranges, and mandarins coming out of our ears. So what do you do with 10lbs of lemons, I guess we will see in the next few days....

Tuesday, December 20, 2011

Hawaiian Popcorn Balls


Mele Kalikimaka!

Food Network Magazine's Christmas issue had two pages of popcorn balls, and one really stood out to me...Coconut-Almond. Being a coconut freak I knew I had to try these, but I wanted to give them a little more tropical feel, so I used macadamia nuts. They turned out so delicious, not very Christmasy really, but they're definitely DELICIOUS.


Hawaiian Popcorn Balls 
Adapted from Food Network Magazine

2 Tbs butter
1 cup mini marshmallows
12 cups popcorn
1 cup powdered sugar
1/4 cup light corn syrup
1 Tbs water
1/2 tsp vanilla extract
1 cup shredded coconut
2/3 cup chopped macadamia nuts
2 cups toasted coconut

In a large saucepan over medium heat, bring to a boil the corn syrup, butter, sugar, marshmallows, and water. Remove from heat and stir in vanilla extract. Add the popcorn, 1 cup shredded coconut, and macadamia nuts, stir until coated. Shape into balls with hands and roll in toasted coconut. 

Peppermint Bark Cheesecake


After seeing the cover of Taste of Home Cooking School, I have been thinking about making a candy covered cheesecake every night while I should be sleeping. I used the original Junior's Cheesecake recipe, execpt with a chocolate spongecake and then I mixed bits of candycane, white chocolate chips, dark chocolate chunks, peppermint chips, and peppermint bark.
Next time I will make the cheesecake a white chocolate cheesecake, make the chocolate sponge cake a little more chocolatey, and I will add much more bits of candy and chocolates. It was a good first attempt though.

JUNIOR'S FAMOUS CHEESECAKE - TURNED PEPPERMINT
Adapted from food.com

Chocolate Sponge Cake
1/2 cup sifted cake flour
1 tsp baking powder
1 pinch salt
3 large eggs separated
1/3 cup sugar
2 tbs sugar
1 tsp vanilla extract
2 oz melted bittersweet chocolate
3 tbs unsalted butter, melted
1/4 tsp cream of tartar

Cream Cheese Filling
4 (8oz) packages cream cheese
1 2/3 cups sugar
1/4 cup cornstarch
1 tbs vanilla extract
2 large eggs
3/4 cup heavy whipping cream
2 oz Ghiradelli Peppermint Bark, broken into pieces (Double it next time?)
2 oz white chocolate chips (Skip this and make cheesecake white chocolate instead)
2 oz dark chocolate, broken into pieces (Double it next time?)
1 oz candy canes crushed (Double it next time?)

Oreo Crumbs
8 Oreo cookies, crushed
2 Tbs butter, melted

Sponge Cake:
Preheat oven to 350 degrees and generously butter a 9in spring form pan.
Sift the cake flour, baking powder, and salt together in a medium bowl and set aside.
Beat the egg yolks in a large bowl with and electric mixer on high for 3 minutes. With the mixer still running, gradually add the 1/3 cup of sugar and continue beating until thick light yellow ribbons form in the bowl, about 5 minutes. Beat in the vanilla and melted chocolate. Sift the mixture over the batter and stir it in by hand until no more white flecks appear. Blend in the butter.
In a clean bowl, using clean dry beater, beat the egg whites and cream of tartar together on high until frothy. Gradually add the remaining 2 tablespoons sugar and continue beating until stiff peaks form. Stir in 1/3 cup of the egg whites into the batter, then gently fold in the remaining egg white. (don't worry if a few white specks remain.)
Spoon the batter into the spring form pan.
Bake the cake just until the center springs back when lightly touched, only about 10 minutes.
Let cool in the pan on a wire rack while you continue making the cheesecake filling. DO NOT REMOVE FROM THE PAN.

Cream Cheese Filling:
Place one 8oz package of cream cheese, 1/3 cup of sugar, and the cornstarch in a large bowl.
Beat with an electric mixer on low until creamy, about 3 minutes, then beat in the remaining 3 packages of cream cheese. Increase the mixer speed to high and add the remaining 1 1/3 cups of sugar and vanilla extract. Add eggs one at a time, beating well after each one. Blend in heavy cream. Mix the filling only until blended. Be careful not to over mix. Add the candy pieces and just swirl into the batter.

Wrap the outside of the spring form pan with two layers of tin foil.(This is to protect it from the water bath, while it's cooking.)

Spoon the filling on top of the baked sponge cake.
Place a kitchen towel in the bottom of a large shallow pan (disposable roasting pan). Place the spring form pan in the towel lined pan. Pour water into the large baking pan about 1 inch up the side of the spring form pan.
Bake the cheesecake until the center barely jiggles when you shake the pan, about 1 hour.
Turn oven off and open the oven door for 1 minute. Close the door and let set inside oven 30 minutes to 1 hour.
Remove from oven and place in refrigerator at least 6 hours.

Run a knife around the side of the spring form pan and remove the cheesecake.

Oreo Crumbs:
In a small bowl mix Oreo crumbs, and melted butter. Pour into a cake pan and bake at 350 degrees for about 5 minutes.
Pat the sides of the cheesecake with the Oreo crumbs, and serve.


Monday, December 12, 2011

French Toast Bread Pudding


I love French toast, but bread pudding??? I have always stayed away from bread pudding just because it sounds really disgusting, that is until a few months ago when I went to breakfast with a friend and decided to try a bread pudding French toast (A slice of bread pudding battered and fried like French toast). Yep, I was right, bread pudding was disgusting. Months went by and as I was watching a bread pudding episode of Sugar High on Food Network,  I began to rethink my hatred of it. I hesitantly went to the kitchen and made a chocolate bread pudding that turned out surprisingly good, which got me thinking...French Toast Bread Pudding.


At least once a month I stand in front of the stove for an hour, slaving away over french toast, finally sitting down to eat after everyone has had their 2nds or 3rds. By making french toast into a bread pudding maybe I could finally eat with my family.
Using my favorite French toast recipe, Norma's Crunchy French Toast, as a guide, I was still having doubts as I was putting the bread pudding into the oven. To my delight the French Toast Bread Pudding turned out wonderful. It was slightly crusty on the top and around the edges, more firm than goopy in the middle, and the French toast flavor...was to die for. I am soo going to make this Christmas morning.


Krispie Caramel French Toast Bread Pudding
Adapted from Norma's Crunchy French Toast

*Warning - I tried making this with Texas Toast and it was way to dry, stick with Brioche.

Rice Krispie Topping
1 cup Rice Krispies
Dash of nutmeg
1 1/2 tsp cinnamon
3/4 tsp cocoa powder
3 tsp sugar
Pinch of salt

French Toast
1 loaf stale bread (I used 1/2 Pullman and 1/2 Brioche)
3 eggs
2 cups heavy cream
1 tbs Grand Marnier
3/4 cup sugar
1 1/2 tsp vanilla
1 tbs cinnamon
pinch of salt

The night before:
Prepare the topping - In a small bowl stir together Rice Krispies, cinnamon, nutmeg, cocoa powder and sugar. Cover with plastic wrap and set aside.
Cut bread into 1/2 inch cubes and fill a 9x13 baking dish with the cubes. Cover with plastic wrap.
Combine the eggs, sugar, vanilla, cinnamon, heavy cream and Grand Marnier. Whisk until incorporated. Cover with plastic wrap and refrigerate until morning.

The morning of:
Remove all of the plastic wrap (:
Pour cream mixture over the bread cubes, pressing down on the cubes to thoroughly soak bread.
Preheat oven to 350 degrees
Bake for 30 minutes. Sprinkle Rice Krispie Topping and continue baking for another 10 minutes.
Serve with caramel sauce.

Thursday, December 8, 2011

Chocolate Mint Thumbprint Cookies


Let me start by saying I am not a fan of thumbprint cookies, I find them too dry. These chocolate thumbprint cookies were alright, (It's hard to go wrong with Hershey's Mint Kisses.) but just not my favorite. If for some reason you want to give them a try...

Chocolate Mint Thumbprint Cookies

1 1/2 cups flour
3/4 cups sugar
1/2 cup cocoa powder
1/2 tsp salt
6 tbs butter, softened
2 large eggs, lightly beaten
1 egg white

In a large bowl beat butter on medium speed for 30 seconds. Add sugar and beat until combined. Beat in eggs and vanilla. Add flour and mix until combined. Cover and chill for 1 hour.

Preheat oven to 375 degrees. Roll dough into 1 inch balls. Roll balls into egg white, then chocolate sprinkles. Place 1 inch apart on cookie sheet. Using your thumb, make indention in each ball.

Bake 10-12 minutes. Let cool for 10 minutes before filling thumbprint with Hershey's Kisses. Move to wire rack and let cool completely.

Tuesday, December 6, 2011

Peppermint Patties


For some reason during the other 11 months in the year I forget how much I love peppermint, then December comes around I am am transformed into a peppermint junkie. Dreyer's Peppermint Ice Cream, Andes Mint Baking Chips, Hershey's Mint Kisses, and the mother of all peppermint the Ghirardelli Peppermint Sundae. (I have been known to hoarded a few of these things in the freezer for later in the year, which I then don't ever eat.)


Months ago a friend told me about making homemade peppermint patties, and now that December is finally here I decided it was time to make them. These were like large gourmet Junior Mints, rich Valrhona Chocolate covering a smooth gooey mint filling. They may be a little time consuming, but they taste absolutely wonderful. Now, if I only had better chocolate dipping skills (:


Peppermint Patties
Adapted from Food Network Magazine

2 cups powdered sugar
2 tbs light corn syrup
1 1/2 tbs softened butter
2 tsp milk
1 tsp peppermint extract
1/2 tsp vanilla extract

Chocolate coating:
8 oz chocolate
2 tsp shortening

Beat powdered sugar, corn syrup, butter, milk, peppermint and vanilla extract until smooth.
Chill in freezer for 30 minutes.
Dust generously with powered sugar and roll out 1/4 inch thick.
Chill again for 15 minutes.
Cut into stars and freeze until hard.
Melt chocolate with 2 tsp of shortening in the microwave.
Let cool to room temperature.
Take out 1/2 of the stars from the freezer, dip them into the chocolate and sprinkle with nonpareils.
Repeat with the second half of the stars.
Chill until set.

Thursday, December 1, 2011

Christmas Is Coming


Every year while on Thanksgiving vacation, I load up on magazines and get inspired for Christmas.
My magazine reading is actually quite a process. It begins with flipping though each magazine, making mental notes of what looks good. Then I go back through and folding the corners of the things I like. After that I actually read the recipes. Finally, when we get home, I rip out all the pages I had folded and put them in a binder. (A tip I learned from my friend and her mother.) Just when you thought I couldn't be more compulsive, I then make a list of everything I want to make in December and map it out on my calendar. (I know what your thinking, "Psycho".)


One of the things that caught my eye in the Better Homes and Gardens Christmas Cookies magazine wasn't even a recipe, it was the gift packaging. It is such a simple idea, that's not only great for Christmas, but would make a cute goodie bag for birthdays as well.


To make the bags you need festive scrapbook paper, glue, scissors, and cellophane bags (found at your local craft store or even Walmart). Cut scrapbook paper to fit folded over bag, fill the bag with goodies, fold top of bag down, cover with scrapbook paper, and staple on each side of the scrapbook paper. Voila! Cute food gift for Christmas.


You might be wondering what is in this bag, it's Oreo Coal. I saw a photo of No-Bake Cookies and Cream Bars on the Picky-Palate blog, and instantly thought of coal. They turned out perfect for the naughty people on my Christmas list. (They look even better in real life.)


Oreo Coal
From Picky-Palate

1 bag of Oreos (15oz)
1 bag large marshmallows (10oz)
4 Tbs butter 

Put Oreos in a food processor and process until crumbs.
Grease a 9x9 baking dish. (I use a silicone pan so I skip this part.)
In a large saucepan melt butter over low heat. Add Marshmallows and stir until completely melted.
Remove from heat and stir in Oreo crumbs, until well coated.
Pour into baking dish and press to spread.
Using the thin side of a rubber spatula hit the top of the Oreo mixture to make a few indention's for a coal like appearance.
When cool, cut into uneven shapes.


These are really chewy and dense, and taste just like Oreos and marshmallows. I think they look better than they taste, but the people at work seemed to really like them (:

Thursday, November 17, 2011

Caramel Apple Cupcakes


Our family's Thanksgiving always consisted of the typical turkey, stuffing, mashed potatoes, vegetables, but then there was dessert; pecan pies, pumpkin pies, apple pies, and even lemon meringue. (Obviously baking runs in my blood)  Although not as traditional as the pies, the flavor of these cupcakes scream Fall, and would make a great addition to my family's dessert buffet.
The cake was very light and moist, tasting a little like a spicy cinnamony carrot cake. (The apple flavor went missing.) The frosting, a delicious and ridiculously smooth buttercream, with a perfect caramel flavor that wasn't too rich or too sweet. I was so pleased with the texture of the frosting that I am thinking about trying it in other flavors as well. As for the reviews, it was unanimous everyone LOVED them, even that super picky co-worker who complains about everything, yeah that one, he ate two. (:


Caramel Apple Cupcakes
Adapted from Baked
Makes a boatload of cupcakes (about 45)

Apple Cake:
4 cups flour
2 teaspoons baking soda
1 teaspoon baking powder
1 teaspoon salt
2 teaspoons cinnamon
1 teaspoon ground allspice
1 teaspoon ground clove
1 ½ cups unsalted butter, at room temperature, cut into small pieces
2 ½ cups sugar
2 large eggs
4 cups applesauce (I used 1/2 regular & 1/2 cinnamon)

Caramel Butter Cream:
1 ½ cups sugar
⅓ cup flour
1 ½ cups milk
⅓ cup heavy cream
1 ½ cups unsalted butter, room temperature, cut into small pieces
1 teaspoon pure vanilla extract
⅓ cup plus 2 tablespoon Smuckers Caramel Sauce at room temperature (Mrs Richardson's would probably be better)

Preheat the oven to 400°F. Prepare cupcake pan with paper liners.
Sift the flour, baking soda, baking powder, salt, cinnamon, allspice, and cloves together into a large bowl. Set aside.
In the bowl of a standing mixer fitted with the paddle attachment, beat the butter until creamy, about 4 minutes. Add the sugar and beat until light and fluffy, about 3 minutes. Add the eggs and beat until combined.
Add the flour mixture to the butter mixture in three parts, alternating with the applesauce, beginning and ending with the flour mixture. Scrape down the bowl, then mix on low speed for a few more seconds.
Divide the batter into cupcake pan. Turn the oven temperature down to 350 and bake 20-30 minutes,  until a toothpick inserted in the center comes out clean. Transfer the pans to a wire rack and let sit until cool enough to touch. Remove cupcakes from baking pan and let cool completely.

Caramel Buttercream:
In a medium, heavy bottomed saucepan, whisk the sugar and flour together. Add the milk and cream and cook over medium heat, whisking constantly until the mixture comes to a boil and has thickened, about 10 to 15 minutes.
Transfer the mixture to the bowl of a stand mixer fitted with the paddle attachment. Beat on high speed until cool. Reduce speed to low and add the butter and vanilla. Mix until thoroughly incorporated. Increase the speed to medium-high and beat until the frosting is light and fluffy.
Add ⅓ cup of the caramel and continue mixing until combined. If the frosting is too soft, put the bowl in the refrigerator to chill slightly, then beat again until it is the proper consistency. If the frosting is to firm, set the bowl over a pot of simmering water and beat with a wooden spoon until it is the proper consistency.

Frost cooled cupcakes and drizzle with the remaining caramel. Place in the refrigerator for 15 minutes to firm before serving.

Monday, November 14, 2011

Peanut Butter Cookies With Chocolate Chunks


My daughter loves to bake, and begs me at least once a week to bake cookies or cakes. Many times I have to tell her no. It's not because I am a mean mom who doesn't want her daughter to improve her baking skills.  It's because I am a mean mom who doesn't like her to text while she bakes, not paying attention to directions, wasting ingredients, and then leaving a mess in the kitchen for me or her father to clean. (She hears this in the Charlie Brown teacher voice "WaWa Wa WaWa".) 
On one of her many second chance she made Peanut Butter Cookies With Chocolate Chunks, and they turned out amazing. (It's shocking what giving your full attention can do) (:  These cookies were crisp on the outside and soft and chewy on the inside with little bits of melty chocolate chunks hiding in each bite. Not only did her cookies come out delicious she also cleaned up after herself, which earned her another day of baking (:


Peanut Butter Cookies With Chocolate Chunks
From Baked
Ingredients
1 ¾ cup flour
2 tsp baking soda
1 tsp salt
2 sticks unsalted butter, at room temperature and cut into 1 inch cubes
1 cup sugar
1 cup packed brown sugar
2 eggs
1 tsp vanilla
1 cup smooth peanut butter
6oz  milk chocolate chunks (I used semisweet)
Sift flour, baking soda and salt together. Set aside.
In a bowl of a stand mixer fitted with a paddle attachment, beat butter and sugar until light and fluffy. Add eggs one at a time, mixing well after each addition. Add the peanut butter and vanilla, beating until just incorporated.

Add half of the flour mixture into the butter mixture and mix for 15 seconds. Add the remaining flour, mixing until incorporated. Stir in the chocolate chunks. Cover, and let rest in the refrigerator for at least 3 hours.
Preheat oven to 375. Line cookie sheet with parchment paper.
Using a small cookie scoop (about 1 tbs), spoon batter onto lined cookie sheet leaving a few inches between cookies. Press the cookie down slightly into a tall disk. Bake in the preheated oven 10-13 minutes, until golden brown.

Sunday, November 13, 2011

Occupy Kitchen


When I hear occupy I hear it as occu-PIE, and it makes me want to go to the kitchen and make a pie. So with 2 months of the news reminding me to make a pie, I finally decided on a Peanut Butter Pie.
I have made several Peanut Butter Pies in the past, the first Peanut Butter Pie I made was good, but the best one I have made was from Sweet Serendipity (Humble Pie). This recipe was pretty good, but I think if I mix this recipe's chocolate bottom cookie crust and the Sweet Serendipity filling,  I would have the PERFECT Peanut Butter Pie. Until then...


No-Bake Peanut Butter Pie
Adapted from Baked
Makes a 9" pie

Cookie Crust:
16 Oreo Cookies
4 tbs unsalted butter, melted and cooled


Chocolate bottom:
½ cup semisweet chocolate chips
½ tsp light corn syrup

Peanut butter filling:
8 ounces cream cheese, at room temperature
1 cup creamy peanut butter
2 tablespoons pure vanilla extract
¾ cup firmly packed dark brown sugar
1½ cups heavy cream

Easy hot fudge sauce:
Milk chocolate
Dark chocolate
1 cup heavy cream
¼ cup corn syrup

Cookie crust:
Preheat oven to 350. Process the cookies in a food processor until fine powder. Sprinkle the butter over the crumbs and pulse to incorporate.
Sprinkle the mixture into a 9-inch pie plate, pressing it up the sides and onto the bottom. You can use the bottom of a measuring cup to even out the crust. Bake until the crust is fragrant and looks set, 10-15 minutes. When it’s done place in the refrigerator until chilled.

Chocolate bottom:
Melt chocolate chips in a microwave on 50% power. Add the corn syrup and stir to combine. Use a spatula to spread the chocolate in a thin layer on the bottom of the chilled pie crust.
Put the crust back in the refrigerator while you make the peanut butter filling.

Peanut butter filling:
Put the cream cheese, peanut butter, vanilla, and brown sugar in the bowl of an electric mixer fitted with the paddle attachment. Beat on medium speed until well combined and completely smooth. Set aside.  In a clean bowl, use the mixer fitted with the whisk attachment to whip the cream until soft peaks form. Remove the bowl from the mixer and, with a rubber spatula, gently fold the whipped cream into the peanut butter mixture until the mixture is uniform in color. Pour the mixture into the prepared crust and freeze for at least 4 hours. Once the pie is frozen, you can cover it with aluminum foil and freeze for up to 3 days.

Easy hot fudge sauce:
Place both the chocolates in a medium heatproof bowl and set aside.
In a small saucepan, bring the heavy cream to a simmer over medium heat. Add the corn syrup and stir to combine. Remove from heat and pour over the chocolate. Let sit for 2 minutes. Whisk the chocolate, starting in the middle, until completely smooth. Sauce can be refrigerated for 3 days.

Serve a small slice of pie with 3 tablespoons of warm fudge sauce poured directly over the top of the pie. The fudge sauce is key, without it it's just too peanut buttery.


Wednesday, November 9, 2011

Better Than New York Waffles & Dinges


I'm back at it, trying to recreate some of the memorable treats I had while in New York, and in this case trying to make it better.
My experience at Waffles and Dinges in New York didn't go quite as I had hoped. The idea was great, fresh waffle with ice cream and chocolate sauce, just like the breakfast my dad made for me as a kid.


The problem with the Waffles and Dinges, at least from the cart at Central Park, was that they were hard as rocks, and had little flavor. I was hoping to find a recipe for a delicious Belgian waffle that would be softer than the original brick that I tried and tastier as well.
The recipe I decided to try was a recipe from the founder of Waffles and Dignes, which was a basic Belgian yeast batter. The outcome was a tasty waffle that was now too soft and chewy.


I didn't want to waste the batter, so even though I didn't care for the waffles, I continued making the entire batch. When I finished pulling the last waffle out of the waffle iron I had an idea...toast them in the toaster. That was just the answer, a few seconds in the toaster made the waffles perfect, slightly crunchy on the outside and moist and chewy on the inside.
 

And as if these waffles weren't sweet enough I tried making them again using an idea from a recipe my friend emailed me, Liege Waffles, using pearl sugar in the batter. (Actually I couldn't find pearl sugar. Ikea use to carry it but now when I need it they don't, so I used sugar cubes.) Adding the "pearl sugar" not only adds sweetness to the waffles, it also adds little bits of crunch, from the sugar crystallizing in the waffle iron. Even without the ice cream and chocolate sauce, these waffles are the best waffles I have made...as long as I toast them before serving :)

Waffles and Dinges
From Food & Wine

1 1/2 teaspoons active dry yeast
1 cup warm water
3 cups all-purpose flour
1/2 teaspoon salt
1 cup whole milk
1 stick unsalted butter, melted
2 large eggs, separated
1/2 teaspoon pure vanilla extract
1 cup pearl sugar, or 24 sugar cubes quartered (Optional) 
Belgian Chocolate-Fudge Sauce:
1 cup heavy cream
10 ounces bittersweet chocolate, chopped
2 tablespoons confectioners' sugar 
 
In a small bowl, dissolve the yeast in the water. In a large bowl, stir the flour with the salt. Whisk in the yeast mixture, milk, butter, egg yolks and vanilla until smooth.
In a medium bowl, beat the egg whites until soft peaks form. Fold them into the batter and let stand for 20 minutes.
While you let the batter stand you can make the chocolate sauce. In a saucepan, bring the cream to a boil. Remove from the heat and add the chocolate. Let stand for 2 minutes, then stir until the chocolate is melted. Add the confectioners' sugar and whisk until smooth.
Preheat waffle iron. Pour batter into the iron and sprinkle with some of the "pearl sugar". Cook until the waffles are golden. Repeat with the remaining batter. Toast waffle in toaster for several seconds before serving with your choice of maple syrup or ice cream and chocolate sauce.

* In the original recipe they say to put the waffles in a 250 degree oven after they are done cooking in the waffle iron. When I tried this it did not help with their sad limp exterior, so I have skipped that step and replaced it with toasting them in the toaster.

Tuesday, November 1, 2011

Trick or Treat Macarons


These macarons were perfect for Halloween, because they were both a trick and a treat.
The macaron shells were definitely a treat because they came out perfect; smooth, nice feet, moist interior, and more importantly not hollow. The filling on the other was quite the trick. I made two different fillings, Dark Chocolate Caramel and Browned Butter Spice. The Browned Butter Spice Frosting was a little freaky tasting. I was hoping for a nice warm fall flavor but it turned out to be a weird mixture of sour and spice.


The Dark Chocolate Caramel filling was a mix of a trick and a treat. It had an amazing rich chocolate flavor followed by a hint of caramel, but the consistency was a nightmare. It was too thick to spread on the shell but so thin it oozed out of the cookies while they were sitting in the refrigerator, making a sticky mess.


With that said, the Dark Chocolate Caramel filling with the chocolate shell was so fudgy and delicious, that I would probably make them again.


Basic Macaron Shell
from Kitchen Musings

3 egg whites (aged in the refrigerator 1 day and then microwaved 10 seconds)
125g almond flour
225g powdered sugar
25g granulated sugar
pinch of cream of tartar
1/2 tsp powdered food coloring (optional)

Line 2 large baking sheets with parchment paper.
Prepare pastry bag with a 1/2 inch plain tip.
Using a food processor, pulse almond flour and confectioner's sugar until combined.
In the bowl of a stand mixer whip the egg whites and cream of tartar on low speed until foamy, about 1 minute. Increase the speed to medium high and beat 1 minute. Add granulated sugar and continue whipping until stiff peaks form, about 1 minute.
Gently fold 1/4 of the flour mixture along with the vanilla into the egg whites. Continue adding 1/4 and folding until all the flour is combined, making a thick batter. Fill the pastry bag with the mixture.
Pipe the batter into 1 1/2 inch mounds on the prepared baking sheets, spacing about 1 inch apart.
Let the macarons rest at room temperature for 2 hours.
Preheat the oven to 310. Bake the macarons for 10-12 minutes.

*For chocolate shells add 2 tbs unsweetened cocoa to almond flour and confectioner's sugar during the processing step.


Browned Butter Spice Frosting
Adapted from myrecipes.com 

2/3 cup butter 
1/4 cup honey
1 teaspoon five spice
2 tablespoons heavy cream
1/2 tablespoons lemon juice
1 tablespoon apple cider
3 cups powdered sugar 

Cook butter in a medium saucepan over medium-low heat, swirling pan occasionally, until deep golden brown, 10 to 15 minutes.
Pour into the bowl of a stand mixer, place in refrigerator and chill until solidified.
Add remaining ingredients and beat until fluffy, 1 to 2 minutes, occasionally scraping inside of bowl.

Dark Chocolate Caramel Filling
From winespectator.com

3/4 cup (180 grams) heavy cream
2 cups (400 grams) granulated sugar
1 teaspoon (4 grams) freshly squeezed and strained lemon juice (from 1/2 lemon)
4 ounces (120 grams) bittersweet chocolate, chopped
1 teaspoon (3 grams) vanilla extract
Heat cream in a saucepan over medium heat until scalding, about 3 minutes. Set aside.
Heat the sugar and lemon juice in another medium saucepan over medium heat. Stir with a wooden spoon until the sugar resembles wet sand. Cook until the syrup turns a clear amber color, and the edges begin to foam,  about 10 minutes. Stir only if the sugar does not melt evenly.
Remove from the heat and immediately pour in the cream to stop the cooking process. Be careful, the syrup will steam and may splatter. Whisk in the chocolate and vanilla, pour the caramel into a container, and let it cool at room temperature for 2 hours. Cover, then refrigerate for several hours.

Sunday, October 30, 2011

This is Halloween, Halloween! Halloween!


One of my favorite candies of all time is the See's Scotchmallow, A layer of caramel with a layer of honey marshmallow covered in chocolate. As a kid my Great Uncle would give out 1 pound gift certificates to See's, and I would get an entire pound of Scotchmallows.


For Halloween I made my own candies that I call Carmallows. And then to really show off I wrapped them in Fanci-Foil (paper foil for cake boards found at Walmart) and decorated them with jack-o-lantern stickers. A perfect candy for a Halloween Party.


The recipe I used came from the Chocolates and Confections book from The Culinary Institute of America, but this recipe is very similar.


Carmallows
Caramel
Adapted from Allrecipes
1 cup Butter
1 pound Sugar
1 (14 ounce) can Sweetened condensed milk
1 cup Light corn syrup
1 pinch Salt
1 1/2 teaspoons Vanilla extract

Marshmallow
From Hutchinson News
3 envelopes Gelatin
1/2 cup Cold water
1 1/2 cups Sugar
3/4 cup Light corn syrup
1/4 cup Honey
1/2 cup Water
1 tablespoon Vanilla extract

3 cups chocolate, melted, tempered (Callebaut Couverture Callets)


Directions:
Set aside a silicone 9x13 pan
In a heavy bottom saucepan, combine the butter, sugar, condensed milk, and corn syrup. Stirring constantly bring to a boil over medium heat, until the syrup reaches 240 degrees.
Remove from heat and carefully stir in the vanilla and salt.
Pour into the silicone pan and let cool while you make the marshmallow.

To make the marshmallow, stir the gelatin and cold water in a small bowl. Set aside.
In a 2-quart saucepan, combine sugar, corn syrup, honey, and water. Cook to 250 degrees.
Remove from heat and pour into the bowl of a stand mixer fitted with the whisk attachment. Allow to cool undisturbed until syrup reaches 210 degrees, about 15 minutes.
Meanwhile, melt the gelatin over a hot water bath. 
When the syrup reaches 210 degrees add the melted gelatin and mix on high speed for 6 minutes, until light and fluffy. 
Add the vanilla and mix until incorporated.
Pour over the top of the caramel and spread evenly.
Allow to cool to room temperature for at least 2 hours.

Chill slightly before cutting into bars.
Using an oiled knife, cut around the edges of the pan to loosen the marshmallow. Remove the entire slab from the pan and place on a silpat, caramel side down.
Cut slab down the middle lenghtwise. Cut each half slab into 1 inch bars, then cut each bar in half. (Be careful not to cut the silpat. I used my bench knife.)

Dip each bar into tempered chocolate and place on baking rack, allowing excess chocolate to drip off. Remove from rack before chocolate sets and place on a piece of parchment paper to set completely.

Friday, October 14, 2011

Desperation Bars


Early Saturday morning I woke up to a sore throat, then a runny nose and then a full blown cold. After 4 days of being confined to a couch and watching Food Network I was ready to crawl into the kitchen and bake something.
Still being a hot mess I could not be seen in public so I had to find something that I could make with whatever I could scrounge up in the pantry. Chocolate chips...nope, milk, heavy cream, unsweetened chocolate, cocoa powder....uh-uh. I was desperate and had very limited ingredients available, so I threw a Hail Mary, and it turned out extremely tasty. (And I am not a cookie bar kind of person.)


Desperation Bars

Based on 7 Layer Cookie from Inn Cuisine

1 1/2 cups graham cracker crumbs
6 tbs melted butter
1 cup Scharffen Berger bittersweet chunks
1 cup Scharffen Berger semisweet chunks
1 cup white chocolate chips
1 cup shredded coconut
2-3 tbs cocoa nibs  (Doesn't everyone have nibs on hand at all times) (:
1/3 cup old fashion oats
1 can sweetened condensed milk

Preheat oven to 350 degrees
Mix graham cracker crumbs and butter and press into 9x13 pan
Sprinkle bittersweet and semi sweet chocolate over the graham cracker
Sprinkle the white chocolate over the bittersweet and semi sweet chocolate
Sprinkle coconut over white chocolate
Sprinkle cocoa nibs over coconut
Sprinkle oats over the top of the coconut and nibs
Pour sweetened condensed milk over all the layers.
Bake for 30 minutes or until golden brown.
Let cool and cut into squares.

Next time I make them I will make sure my pantry is fully stocked, because there are so many possibilities. Peanut butter chips, mini marshmallows, M&M's, raisins... ooh what about pretzels :)

Wednesday, October 12, 2011

Baked NYC Brownies


I'm still missing New York City so I continue to live vicariously through recipes of New York bakeries and restaurants. This brownie recipe from Baked turned out to be one of my favorite brownies, dare I say...gasp...even better than Bouchon's.  They are everything I like in a brownie, a rich chocolaty flavor and a gooey fudgy texture. YUMMY! 


Baked Brownies
from brown eyed baker

1 1/4 cups flour
1 tsp salt
2 tbs unsweetened cocoa powder (Valhrona)
11 oz dark Chocolate, chopped (Scharffen Berger Bittersweet Chunks & Ghirardelli Bittersweet Chips)
8 oz unsalted butter, cut into 1 inch cubes
1 tsp instant espresso powder (Ghirardelli Mocha Hot Chocolate Mix)
1 1/2 cups sugar
1/2 cup packed light brown sugar
5 eggs room temperature (if you are in a hurry place eggs in warm water for 10-15 minutes)
2 tsp vanilla

Preheat oven to 350 degrees. Butter bottom and sides of a 13x9 baking pan, and line the bottom with parchment paper.
In a medium bowl, whisk flour, salt and cocoa powder. Set aside.
Using a double boiler, melt the chocolate, butter and espresso powder, stirring occasionally, until melted and smooth. Turn off the heat and add the sugars, whisking until completely combined. Remove the top bowl from double boiler.
Add 3 of the eggs to the chocolate mixture and whisk until combined. Add the 2 remaining eggs and vanilla and stir just until incorporated. Be careful not over beat the batter.
Add the flour mixture to the chocolate mixture, and fold until just a bit of the flour is visible.
Pour the batter into the prepared pan and smooth the top.
Bake for 30 minutes, rotating the pan half way through the baking. The brownies are done when a toothpick inserted into the center comes out with a few moist crumbs sticking to it.
Let brownies cool completely before cutting into squares.

Tuesday, October 4, 2011

Junior's New York Cheesecake


I have gone on several vacations this summer, and as much fun as all those vacations have been, I am still obsessed with New York. Every chance I get I have been researching and testing recipes to bring some of New York to me.
I started with a New York Cheesecake from Junior's. When we walked by Junior's after seeing How To Succeed In Business, we were too stuffed and tired to try their famous cheesecake, but luckily for me I found their recipe online.


Like I have said before I have never been a big cheesecake fan, but I am slowly growing as a person and warming up to cream cheese. Junior's cheesecake is a little different than the cheesecake most people think of, as it replaces the traditional graham cracker crust with a sponge cake. I loved the added layer of sponge cake, but still wanted the familiar graham cracker crust, so I added graham cracker crumbs around the side. It is an extremely impressive cheesecake, and so easy to make.


JUNIOR'S FAMOUS CHEESECAKE
Adapted very slightly from food.com

Sponge Cake
1/2 cup sifted cake flour
1 tsp baking powder
1 pinch salt
3 large eggs separated
1/3 cup sugar
2 tbs sugar
1 tsp vanilla extract
3 drops lemon extract
3 tbs unsalted butter, melted
1/4 tsp cream of tartar

Cream Cheese Filling
4 (8oz) packages cream cheese
1 2/3 cups sugar
1/4 cup cornstarch
1 tbs vanilla extract
2 large eggs
3/4 cup heavy whipping cream

Graham Cracker Crumbs
1 cup finely ground graham crackers
1/2 tsp cinnamon
1 stick melted butter

Sponge Cake:
Preheat oven to 350 degrees and generously butter a 9in spring form pan.
Sift the cake flour, baking powder, and salt together in a medium bowl and set aside.
Beat the egg yolks in a large bowl with and electric mixer on high for 3 minutes. With the mixer still running, gradually add the 1/3 cup of sugar and continue beating until thick light yellow ribbons form in the bowl, about 5 minutes. Beat in the vanilla and lemon extracts. Sift the mixture over the batter and stir it in by hand until no more white flecks appear. Blend in the butter.
In a clean bowl, using clean dry beater, beat the egg whites and cream of tartar together on high until frothy. Gradually add the remaining 2 tablespoons sugar and continue beating until stiff peaks form. Stir in 1/3 cup of the egg whites into the batter, then gently fold in the remaining egg white. (don't worry if a few white specks remain.)
Spoon the batter into the spring form pan.
Bake the cake just until the center springs back when lightly touched, only about 10 minutes.
Let cool in the pan on a wire rack while you continue making the cheesecake filling. DO NOT REMOVE FROM THE PAN.

Cream Cheese Filling:
Place one 8oz package of cream cheese, 1/3 cup of sugar, and the cornstarch in a large bowl.
Beat with an electric mixer on low until creamy, about 3 minutes, then beat in the remaining 3 packages of cream cheese. Increase the mixer speed to high and add the remaining 1 1/3 cups of sugar and vanilla extract. Add eggs one at a time, beating well after each one. Blend in heavy cream. Mix the filling only until blended. Be careful not to over mix.

Wrap the outside of the spring form pan with two layers of tin foil.(This is to protect it from the water bath, while it's cooking.)

Spoon the filling on top of the baked sponge cake.
Place a kitchen towel in the bottom of a large shallow pan (disposable roasting pan). Place the spring form pan in the towel lined pan. Pour water into the large baking pan about 1 inch up the side of the spring form pan.
Bake the cheesecake until the center barely jiggles when you shake the pan, about 1 hour.
Turn oven off and open the oven door for 1 minute. Close the door and let set inside oven 30 minutes to 1 hour.
Remove from oven and place in refrigerator at least 6 hours.

Run a knife around the side of the spring form pan and remove the cheesecake.

Graham Cracker Crumbs:
In a small bowl mix graham cracker crumbs, sugar and melted butter. Pour into a cake pan and bake at 350 degrees for about 5 minutes.
Pat the sides of the cheesecake with the graham cracker crumbs, and serve.

Sunday, September 25, 2011

New York In 5 Days - Day 4 & 5


Day 4. It was our last full day in New York, and we had a pretty relaxed day planned. (Relaxed for me.)
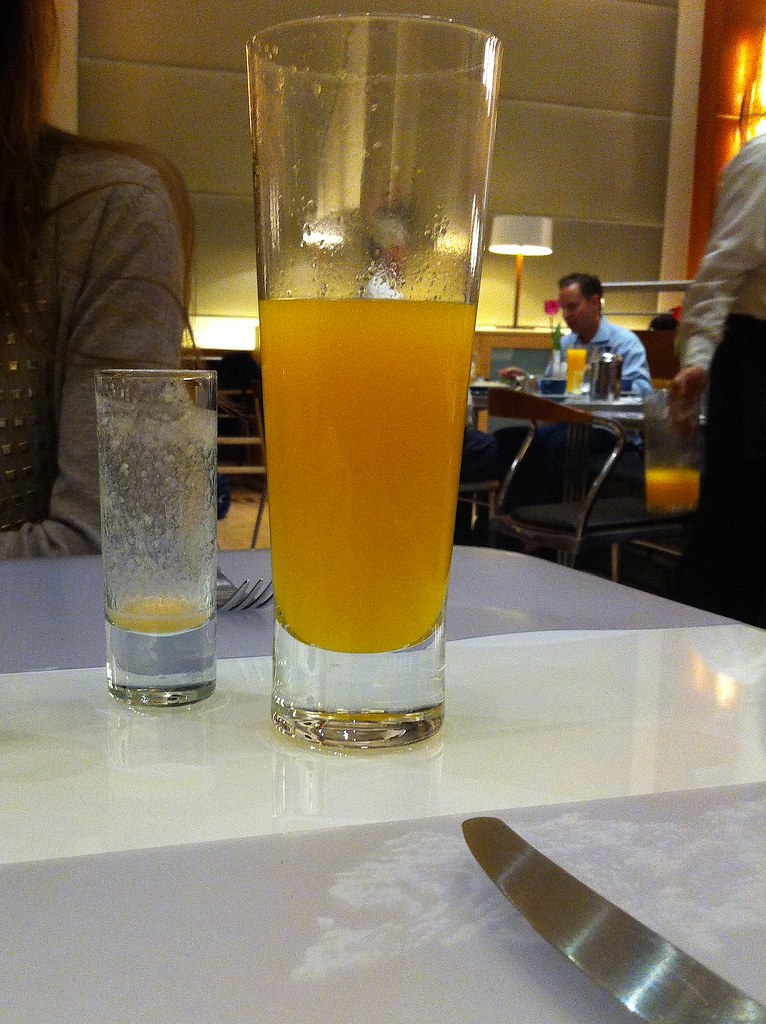
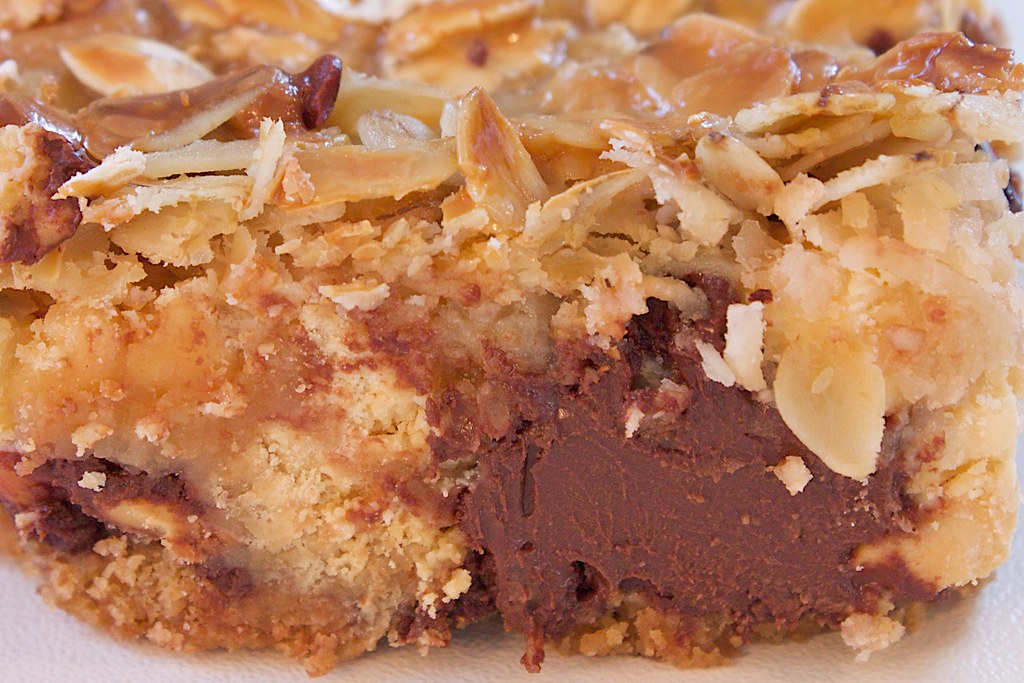
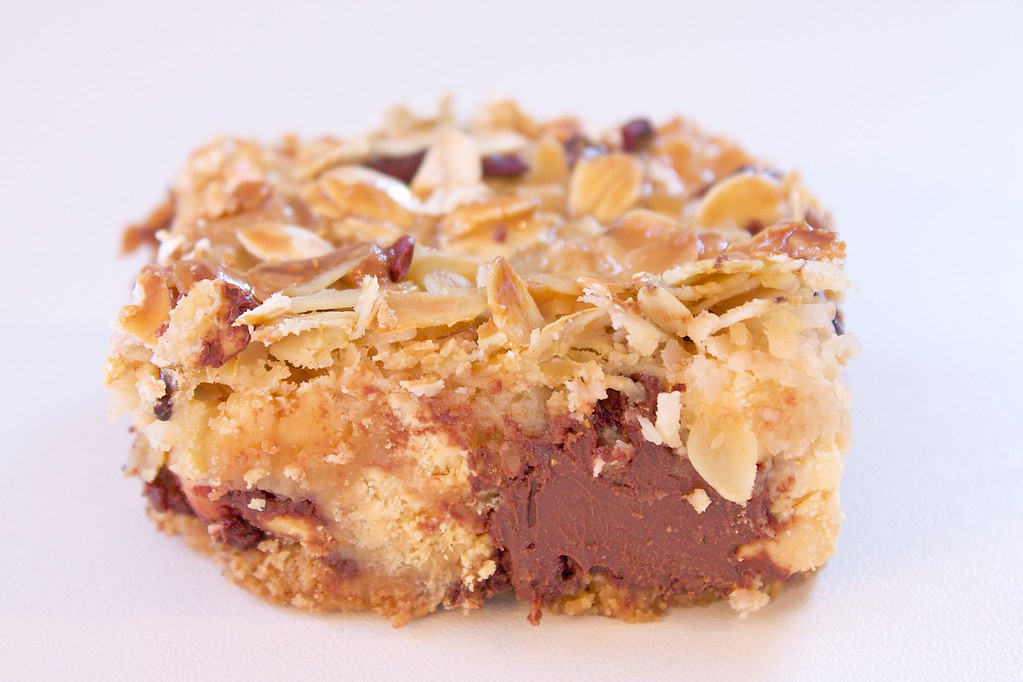
We started our day the way you should, with a nutritious breakfast at Norma's. Located inside Le Parker Meridian, it was not like going to breakfast at Denny's, we were dressed cute and fashionable, but still way under dressed compared to all the businessmen and women around us. (Note to self - Bring formal clothes for breakfast at Norma's) I had been looking forward to this restaurant our entire trip, so I knew exactly what I was going to order, the Chocolate Decadence French Toast, but then after looking over the menu I found several other things I would like to try as well; Lemony Griddlecakes, Very Berry Brioche French Toast, Norma's Supper Blueberry Pancakes, Crunchy French Toast, and the PB&CWaflle'wich. I fought the temptation and stuck with the Chocolate Decadence French Toast, and now will just have to wonder how fabulous the PB&CWaffle'wich really is. I did find out how fabulous the Chocolate Decadence is though; it could be the best thing I ever ate in my life.  (I am not just being dramatic either.) It was like eating a chocolate lava cake for breakfast, each bite of warm chocolatly gooey "bread" melted in your mouth. Even the chopped pistachios sprinkled on top and in between the layers were delicious adding just a little crunch. The only thing I didn't absolutely love were the sliced strawberries that were with the pistachios in-between each layer of "bread". They were cooked, so it was a little slimy for my liking, but it was still the most amazing french toast I have ever had. It also had an amazing price of $86.00 for two plates of french toasts and two glasses of orange juice, but it was worth every penny.


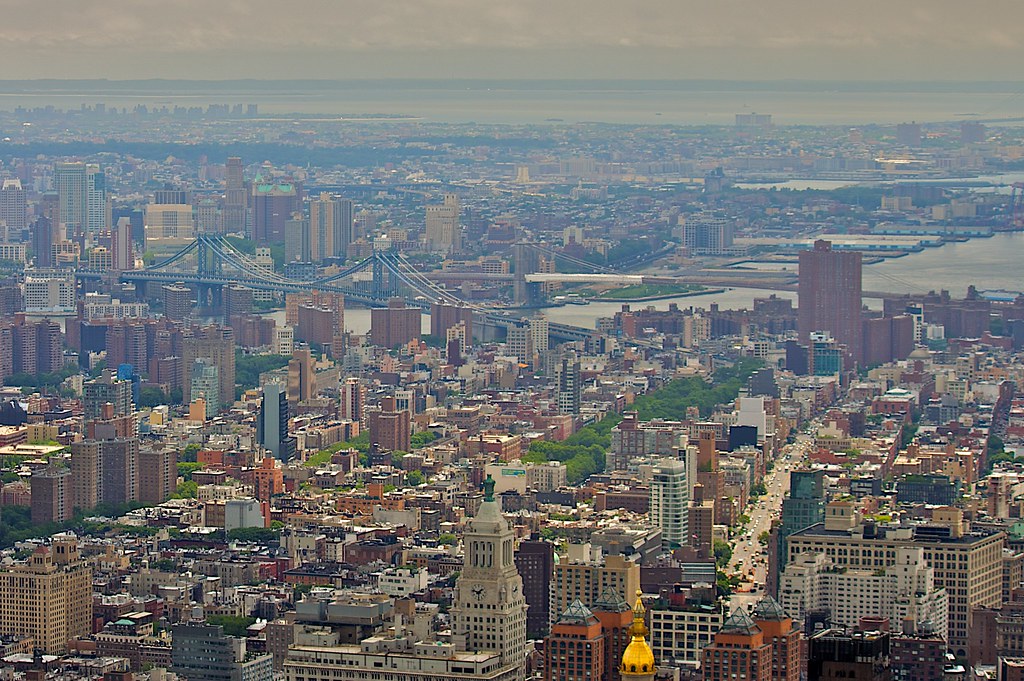
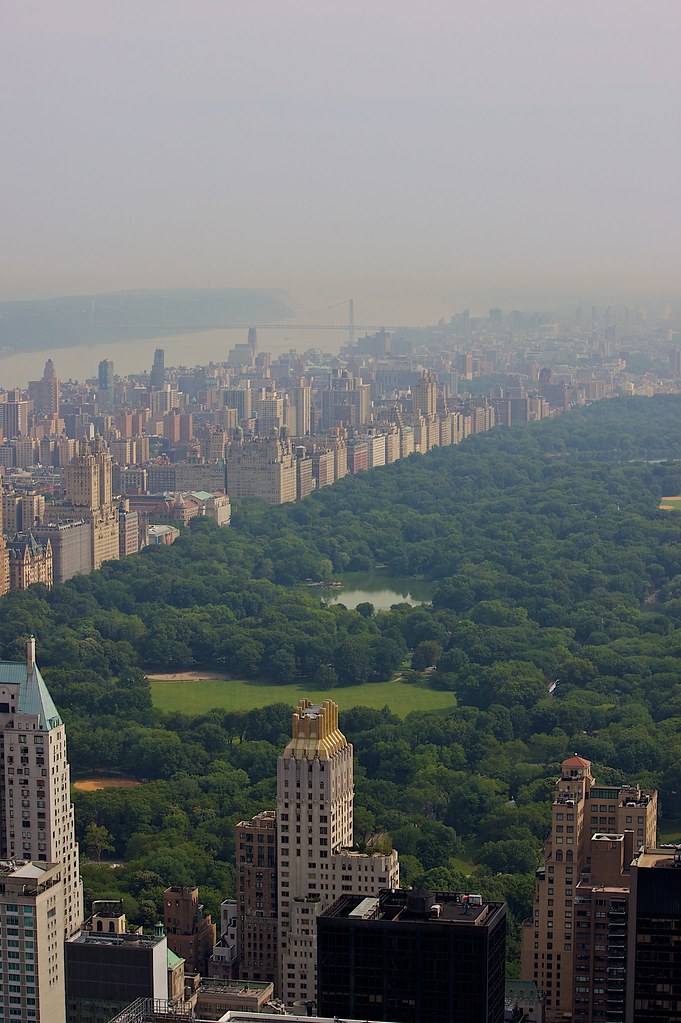
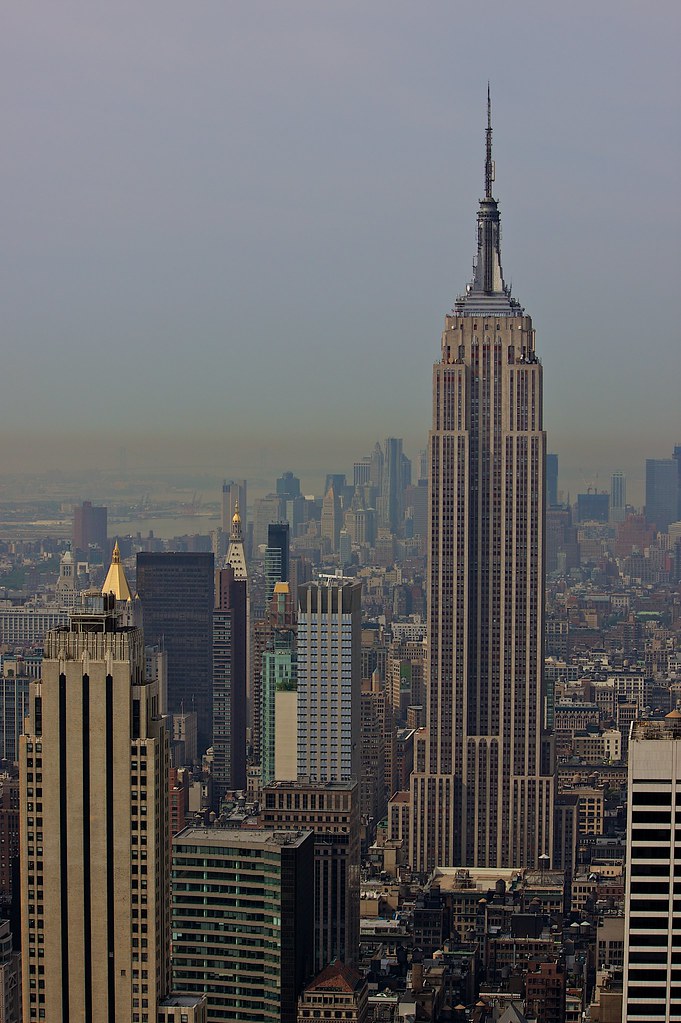
After breakfast we needed to burn off a few of those calories, so we walked back down to Rockefeller Plaza and went to the Top of the Rock. The Top of the Rock is the 67th, 69th and 70th floors of the GE Building with gorgeous views of the city. The view from the 70th floor has to be the best view in the city. Unobstructed by glass, you can see the entire city, including the Empire State Building, which you obviously cant see when you are actually in the Empire Sate Building. If it weren't for the bragging rights of saying "I have been to the top of the Empire State Building, I would skip it and see the city from the Top of the Rock.


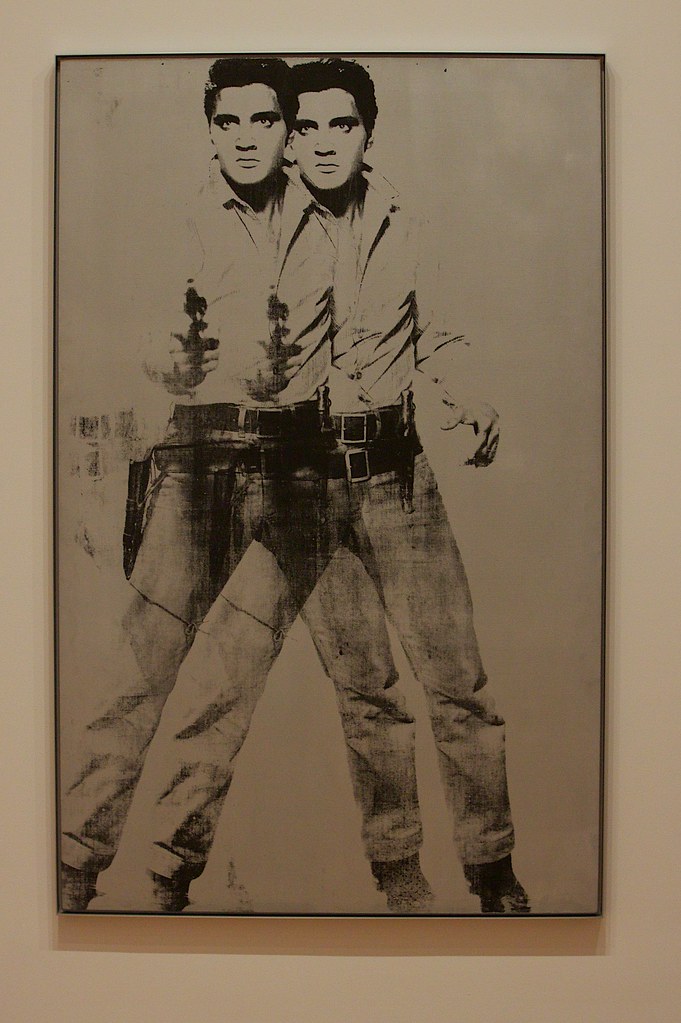
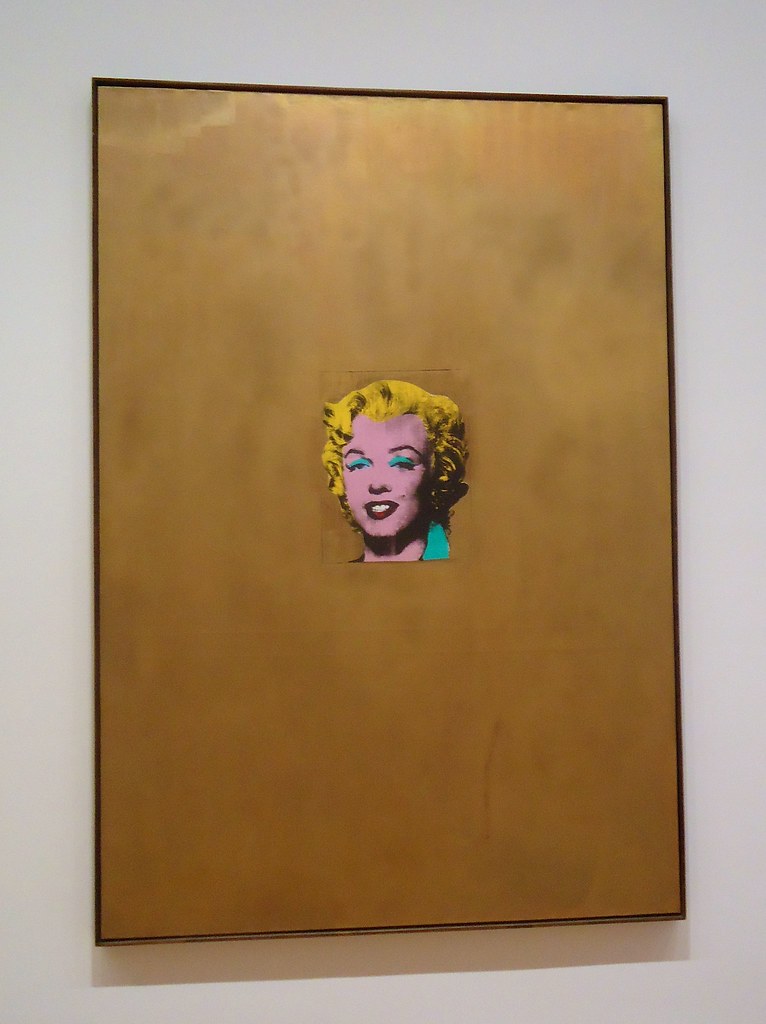
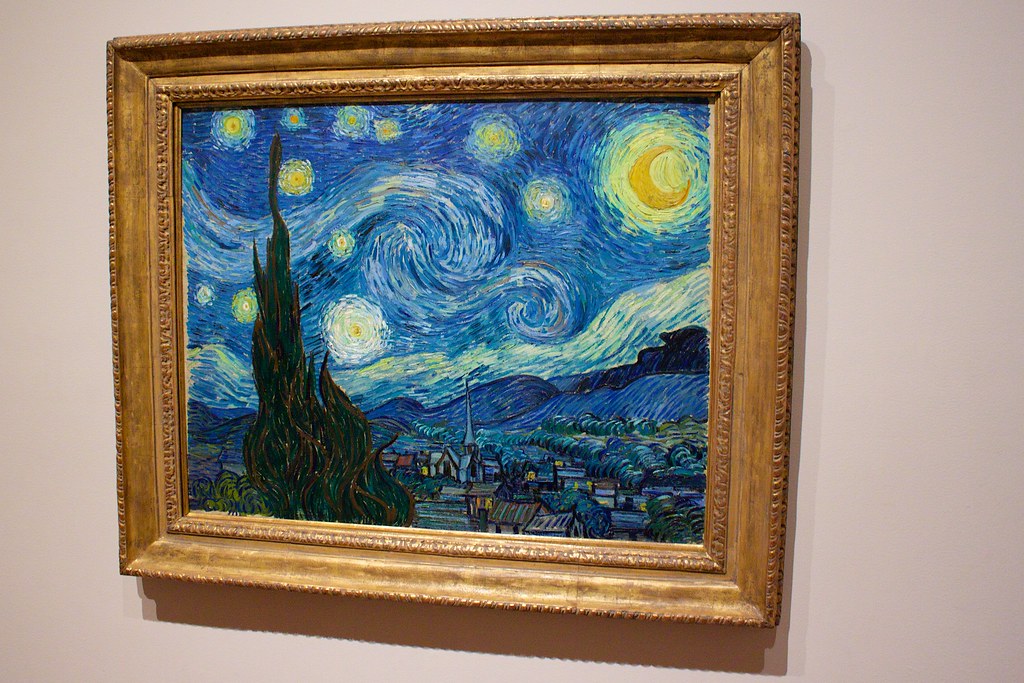
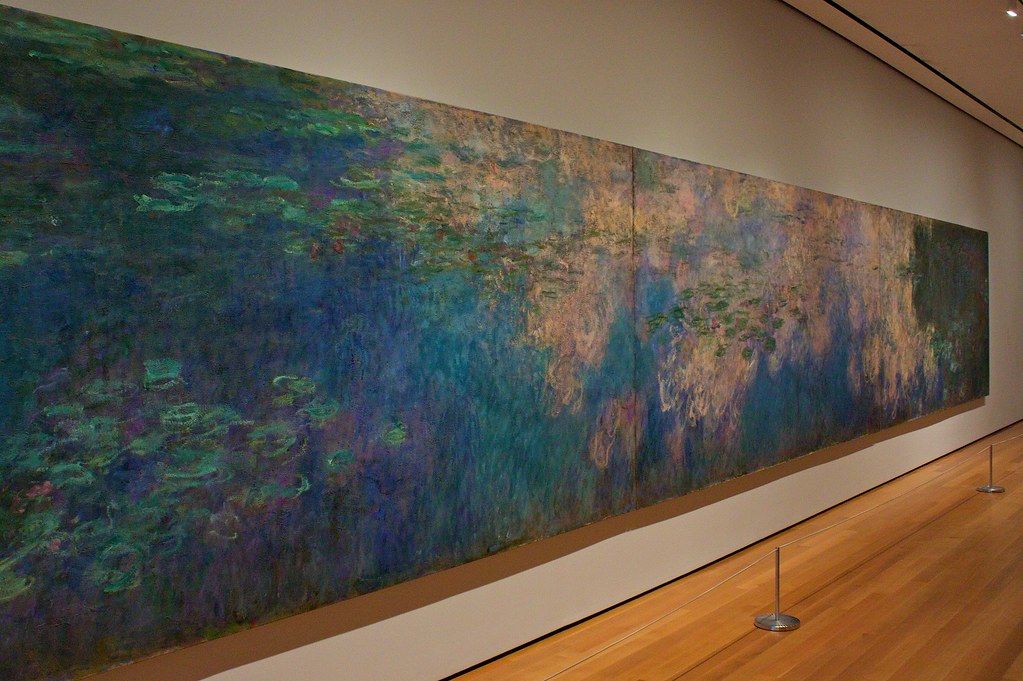
From Rockefeller Plaza we walked a few blocks down 6th Avenue to the MoMA. The MoMA was large, but not overwhelming, what was overwhelming was the hundreds of rowdy school kids. (SHHHH! YOU ARE IN A MUSEUM!) We did our best to avoid the maniac school kids and wandered around looking at all the big names like Warhol, van Gogh, and Monet.


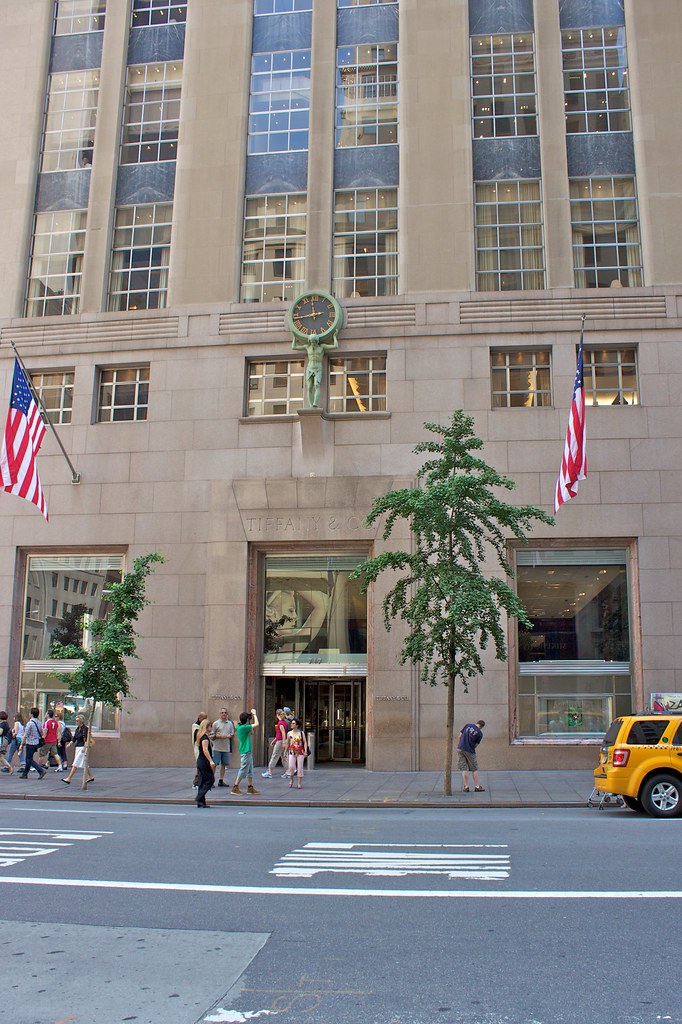
We left the madness of the MoMA and went to another important New York destination...Tiffany &Co. where we each bought a small piece of jewelry to remember our trip by.
"If I could find a real-life place that made me feel like Tiffany's, then I'd buy some furniture and give the cat a name." - Breakfast at Tiffany's


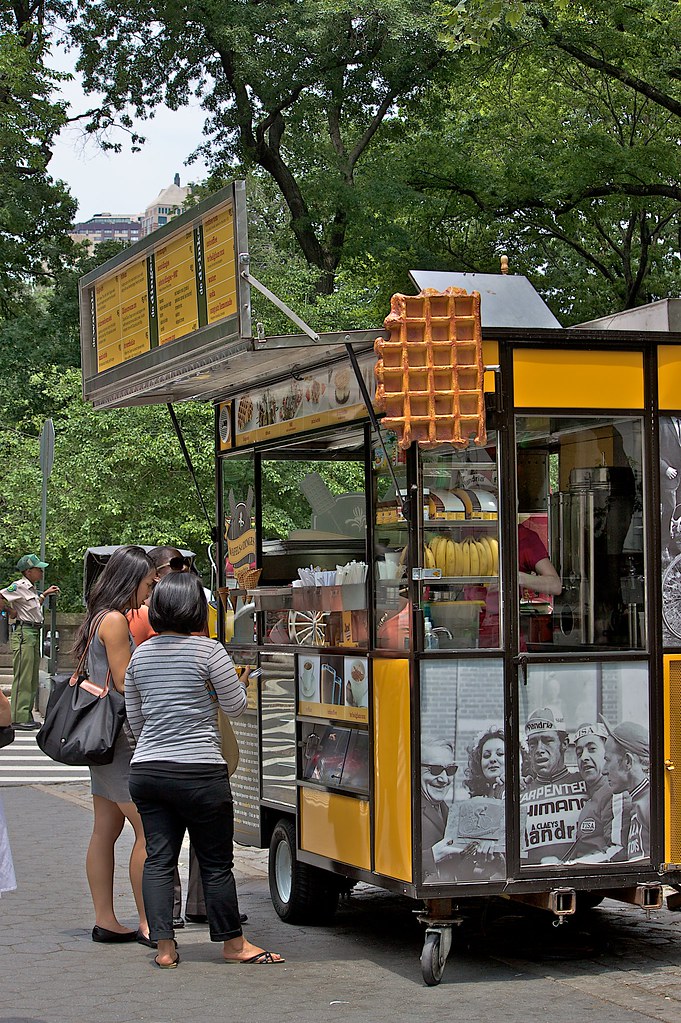
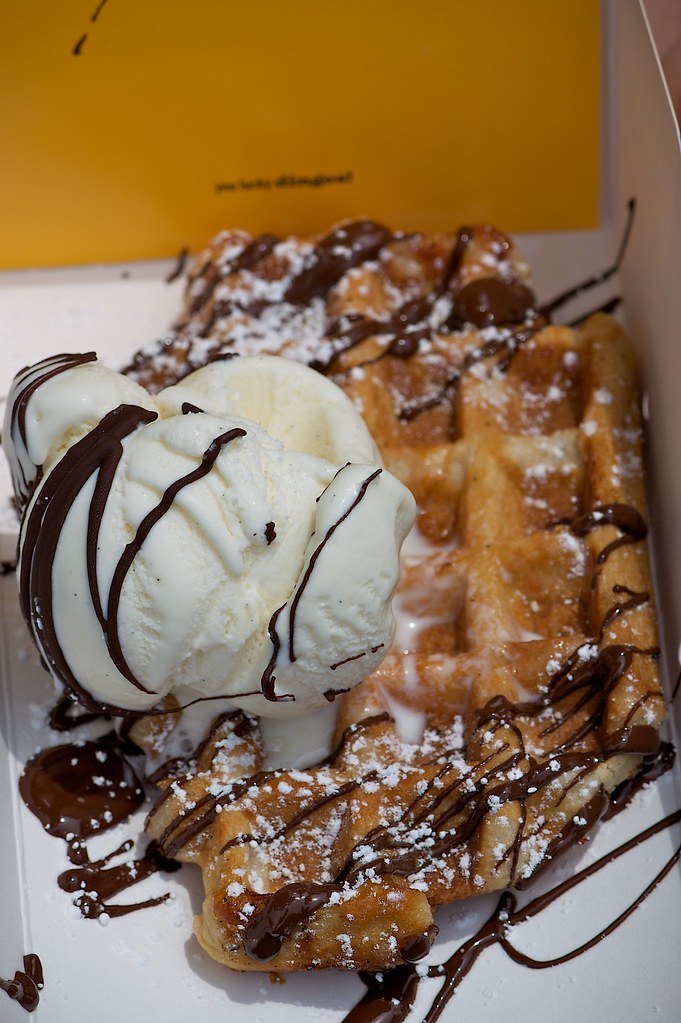
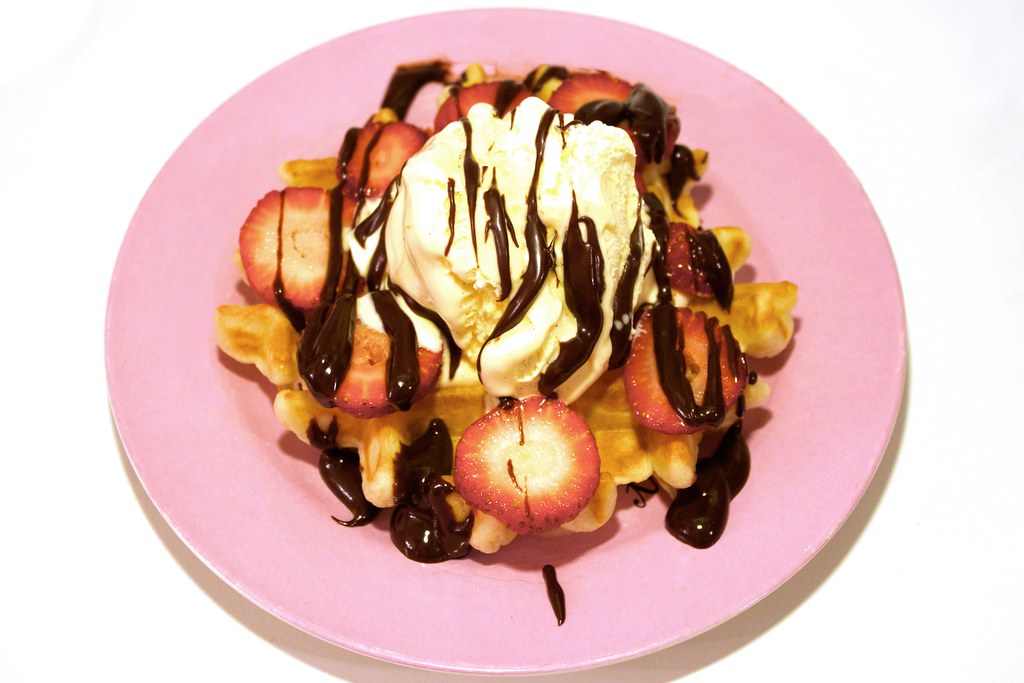
Next on our itinerary was the Metropolitan Museum of Art. We could have taken a taxi or the subway, but then we would have missed all of the Central Park landmarks, so we choose to walk the 2 miles through the park to the Met. Another thing that enticed us to walk was the Waffles and Dinges cart at the entrance of Central Park. I had read about their Belgium Waffles topped with ice cream and chocolate sauce on yelp and I think they were even featured on Throw Down and The Best Thing I Ever Ate. It sounded like the breakfast my dad use to make me, except with Eggo waffles, so I was so excited to try it with "real" waffles. Unfortunately it wasn't what I expected. The waffle was hard; I mean break the plastic fork hard, and very bland, less flavor than a frozen Eggo. The chocolate and ice cream were OK but not good enough to save it from the trash can nearby.


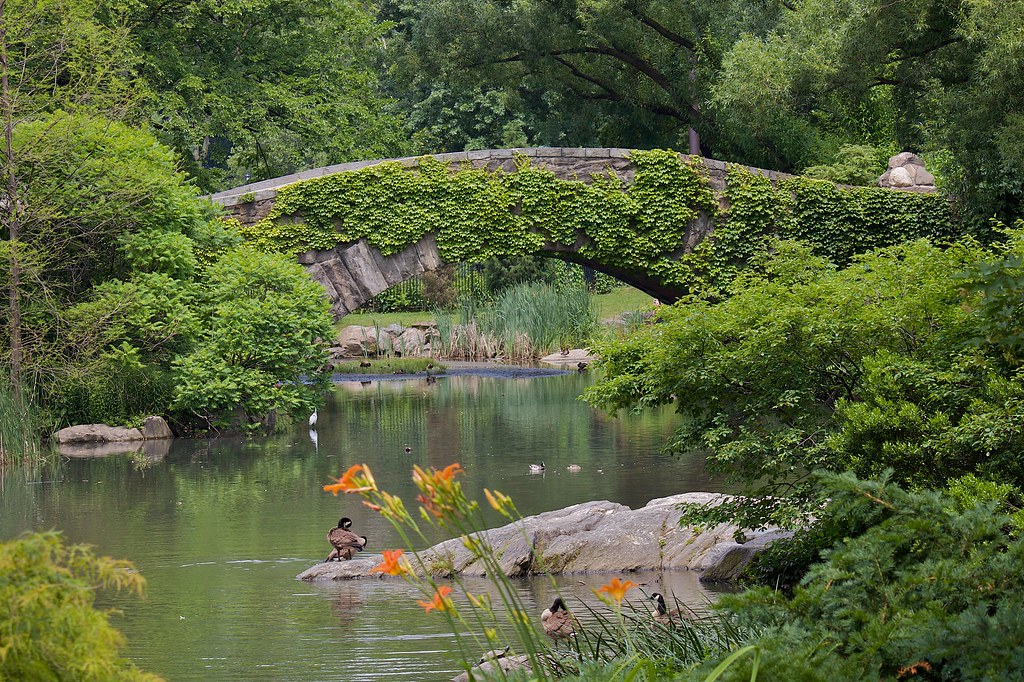
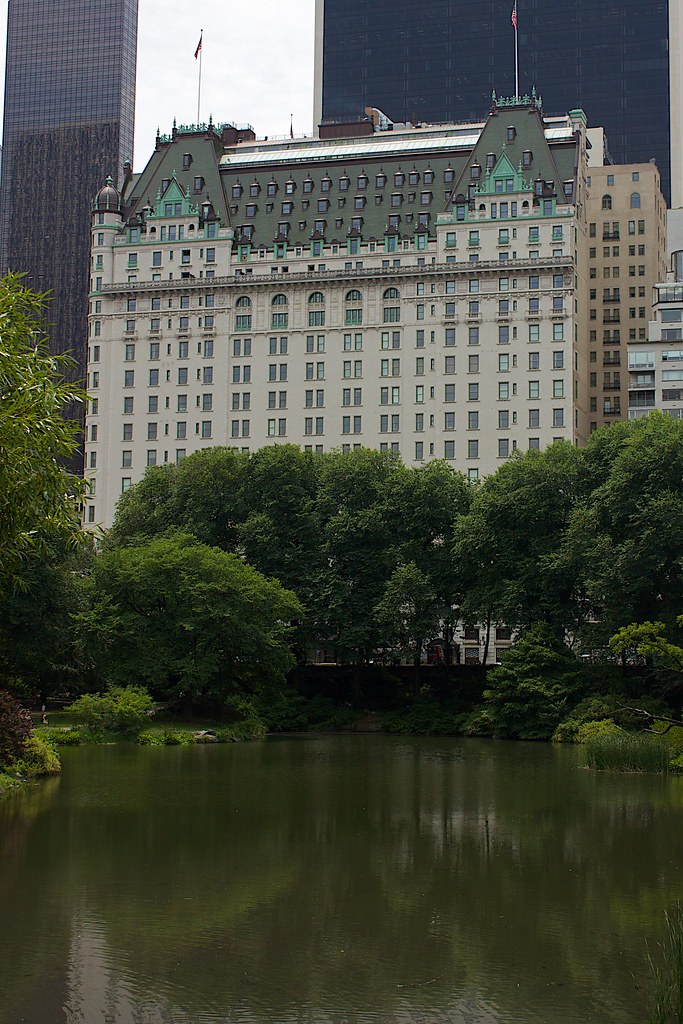
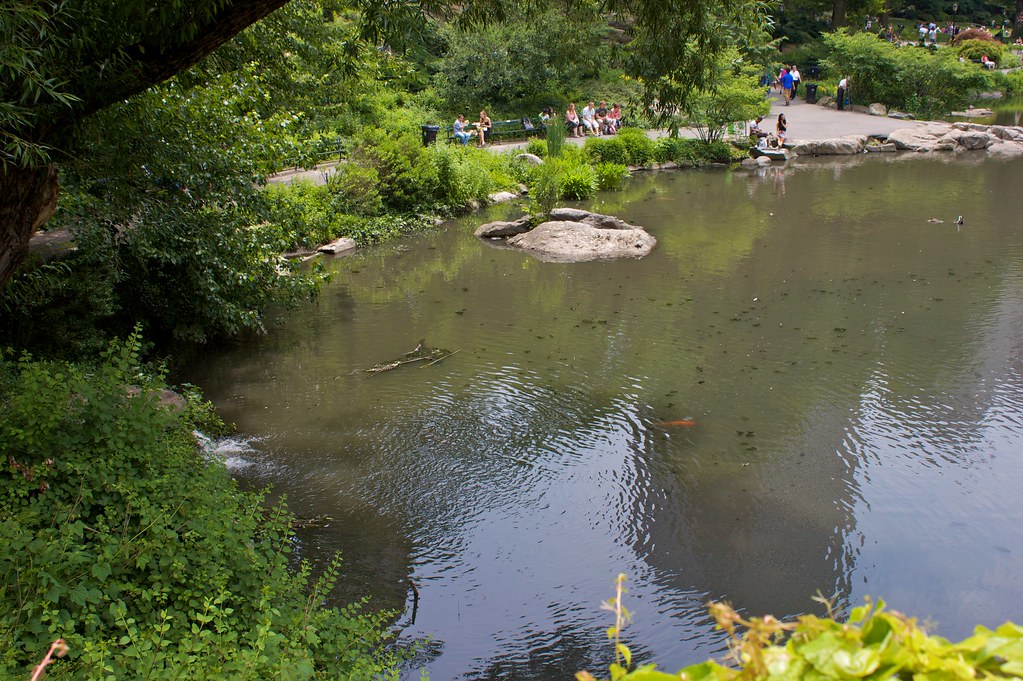
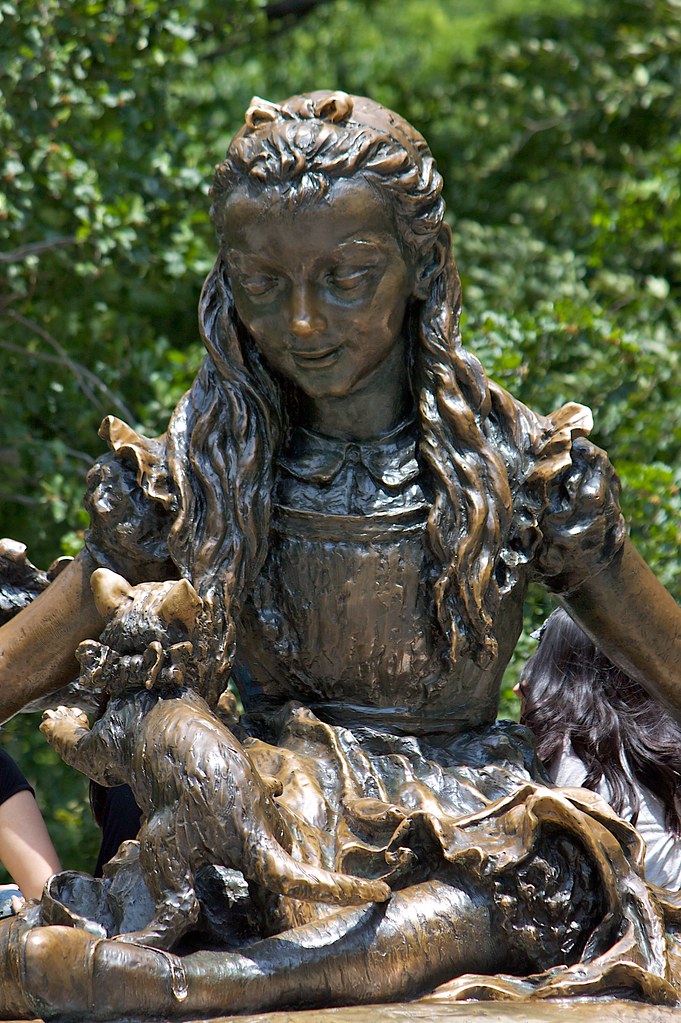
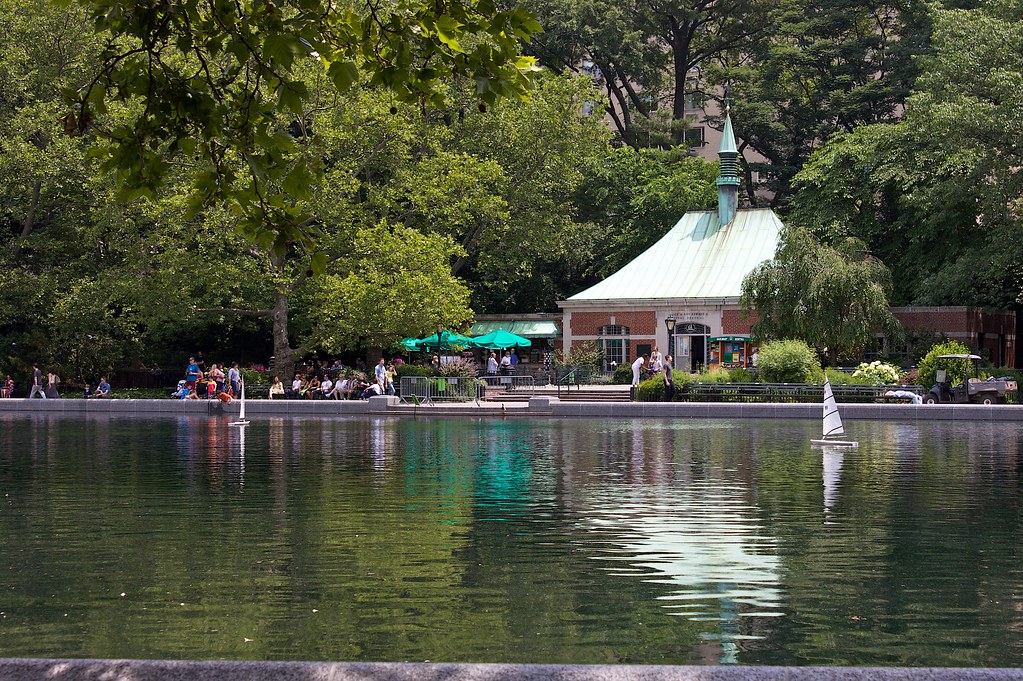
After disposing of the waffle we wandered through Central Park. While the park looked picture perfect, we did noticed that the city must be polluting the park, because The Pond had giant mutant goldfish swimming around (: (They reminded me of the Dr Seuss book with the kid that feeds his gold fish too much and has to move it into the bathtub.) Once we finished marveling at the radioactive fish, we continued walking past the Chess & Checkers House, the Dairy, and the Carousel. When we reached the the Conservatory Water, we found a bench in the shade and rested our feet as we watched the little boats sail across the water.


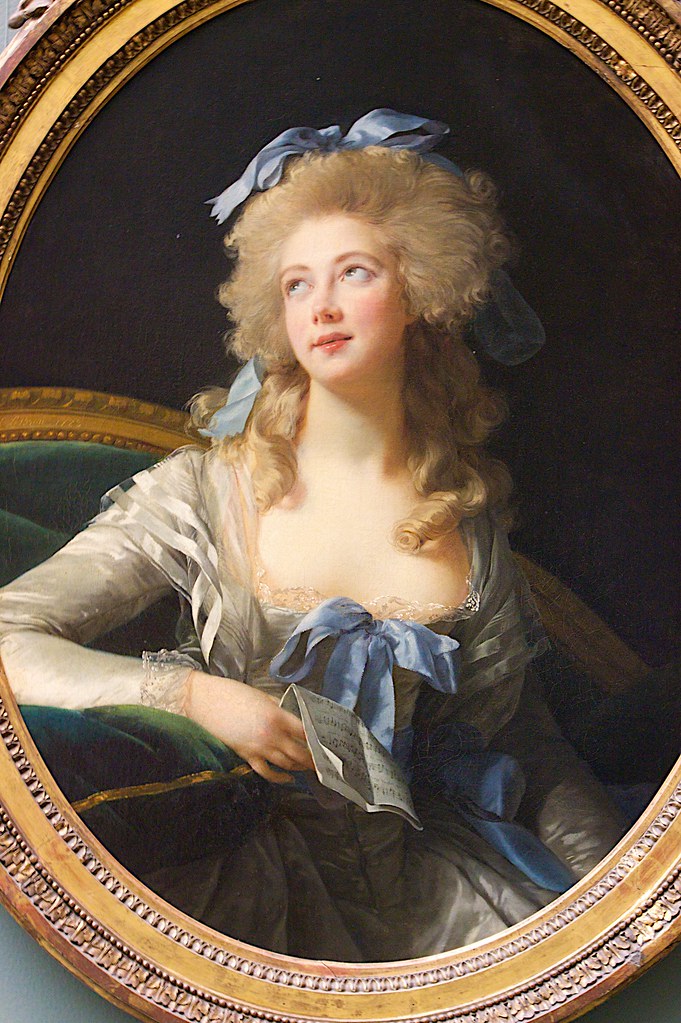
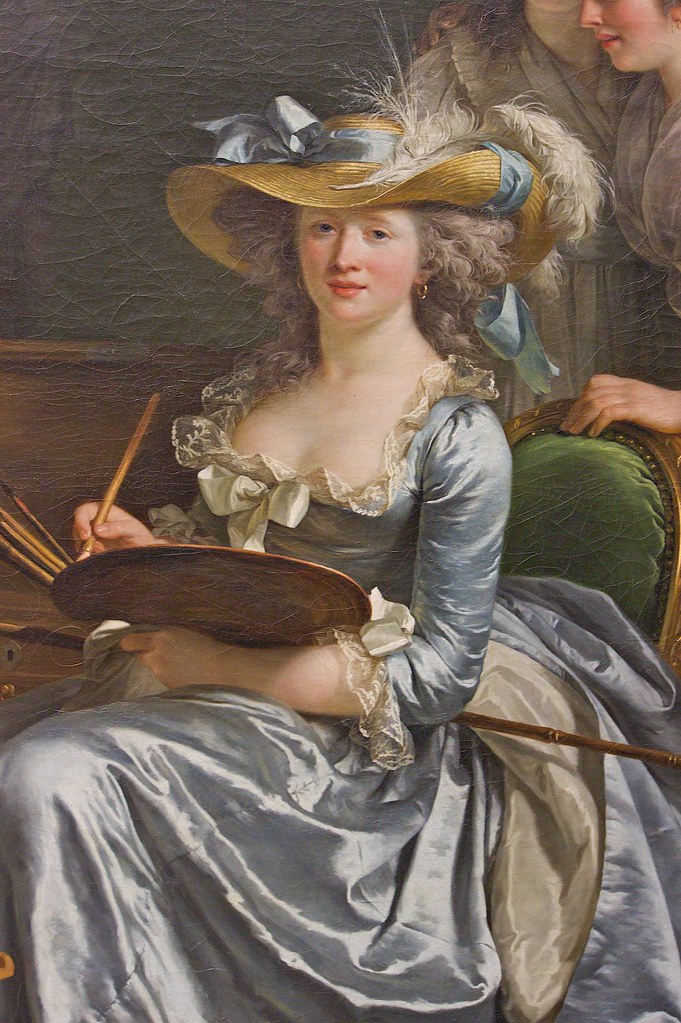
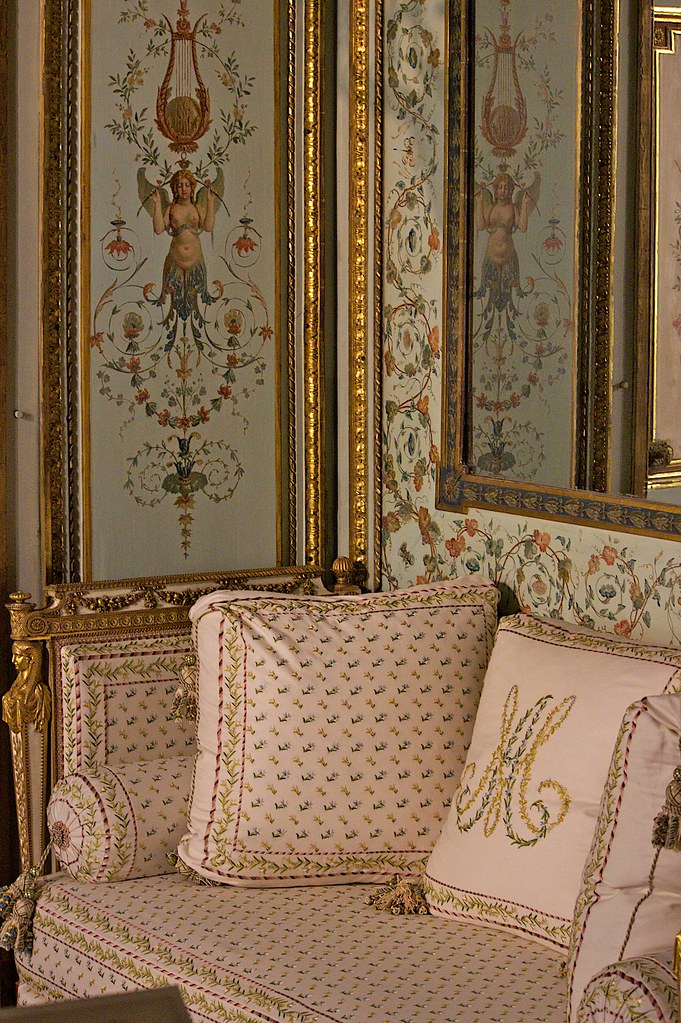
We finally made it to the Metropolitan Museum, and it turned out to be the best art museum in New York. They had so many famous artists on display, Degas, Monet, Matisse, Picasso, Renoir, Seurat, van Gogh, Pollock and Warhol. We oohed and ahhed our way through the paintings, accidentally wandering into the Wrightsman Galleries for French Decorative Arts.  What a pleasant surprise, the Wrightsman Galleries were perfect for someone like me with a slight Marie Antoinette obsession. I felt I walked out of a New York museum and into a 18th century french chateau, where Marie might have just stepped out, leaving the candles still lit.
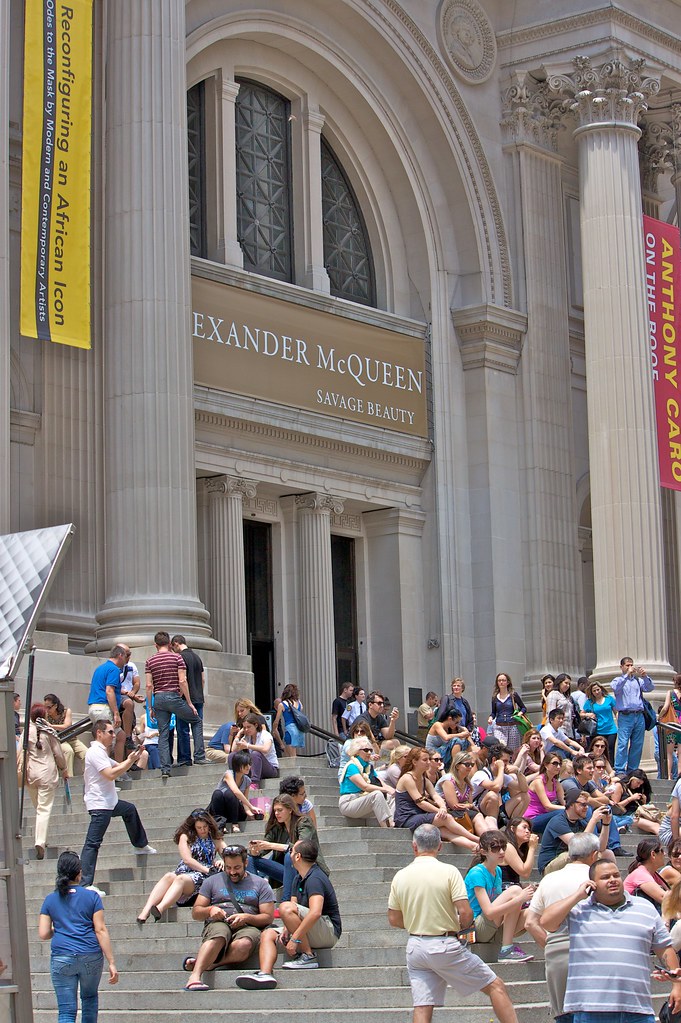
We had one more exhibit I wanted to see, the Alexander McQueen Savage Beauty. We searched high and low for the exhibit, winding up in the European Sculptures several times, before finding it, well we didn't exactly find the exhibit, but the line for it. Not wanting to spend our last day in New York standing in line, we decided to continue on to our next destination.


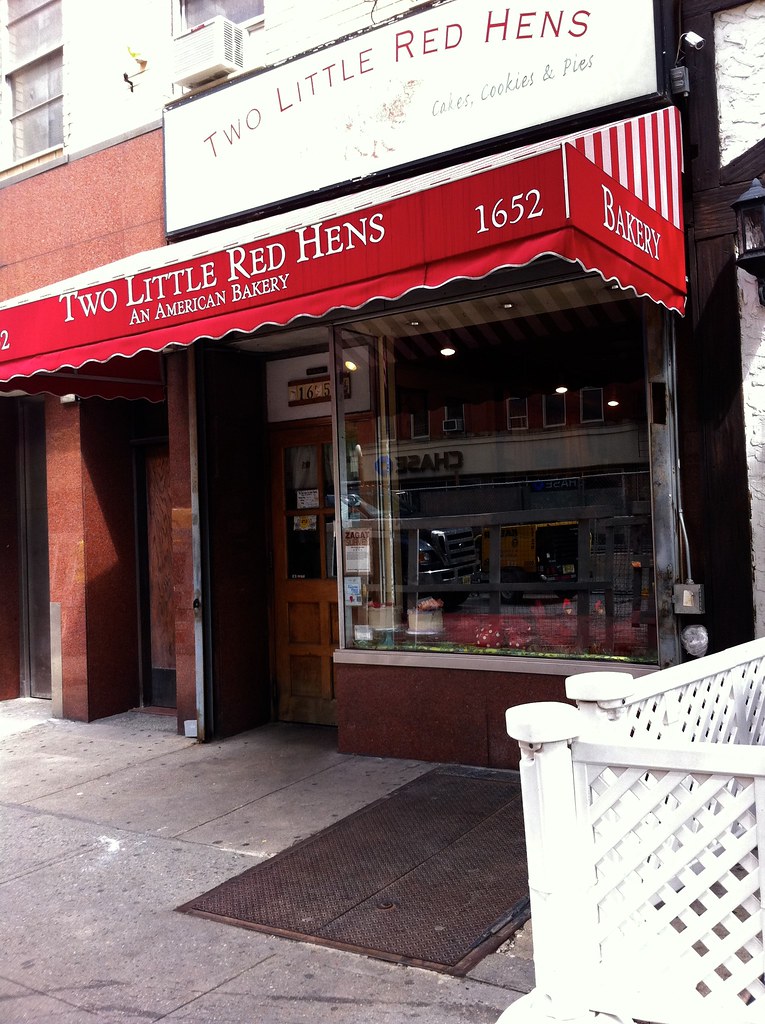
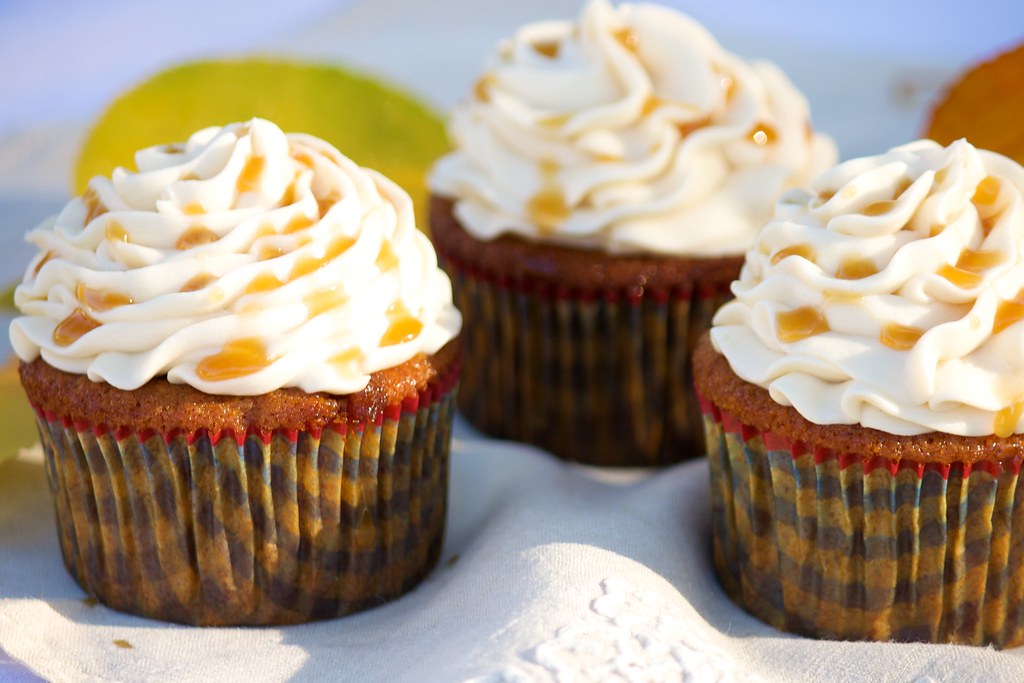
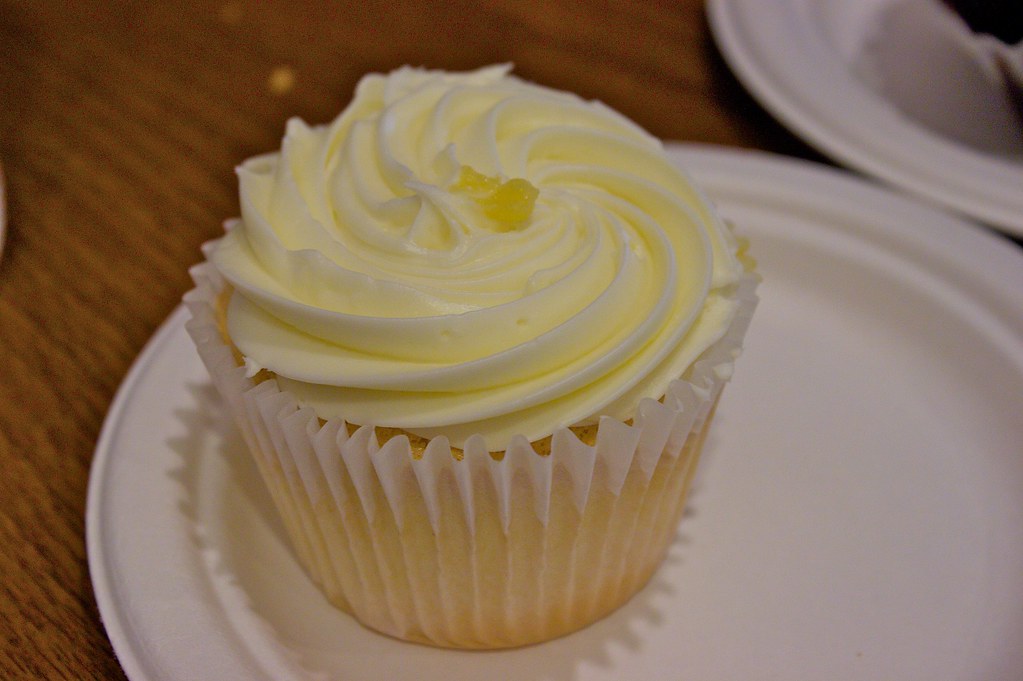
We left the Met, grabbed a hot dog and pretzel from a street cart, and made our way down East 82nd Street towards the Two Little Red Hens Bakery. It seemed like a much longer walk than the .7 miles it was, maybe it was the heat, or perhaps it was the blisters on our feet, but next time I am taking a cab. Inside the bakery the cookies, pies, cupcakes and beautiful floral cakes were all calling my name. (I was actually thinking of a way to bring one of the cakes back in my luggage) We ended up ordering 3 cupcakes, Carrot Cake (delicious), Lemon (refreshingly tart), and Peanut Butter Fudge (Reese's lover's dream). Like everything else we ate in New York (beside Magnolia), they were definitely THE BEST cupcakes I have ever had. (I wonder if I could pay someone to go in and buy me one of everything, then ship it to me?)


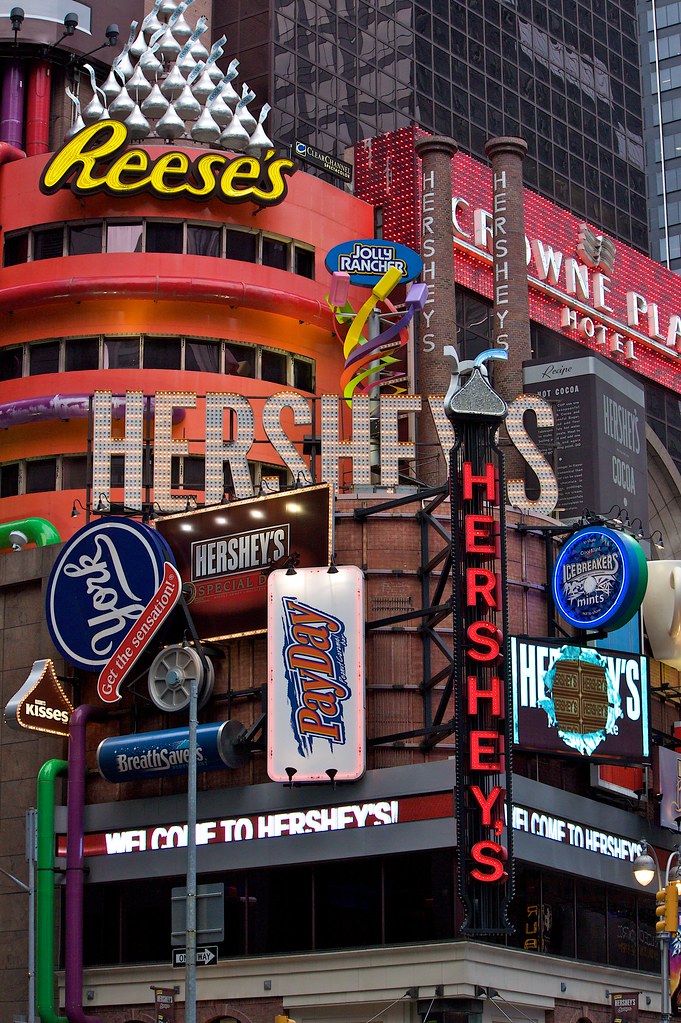
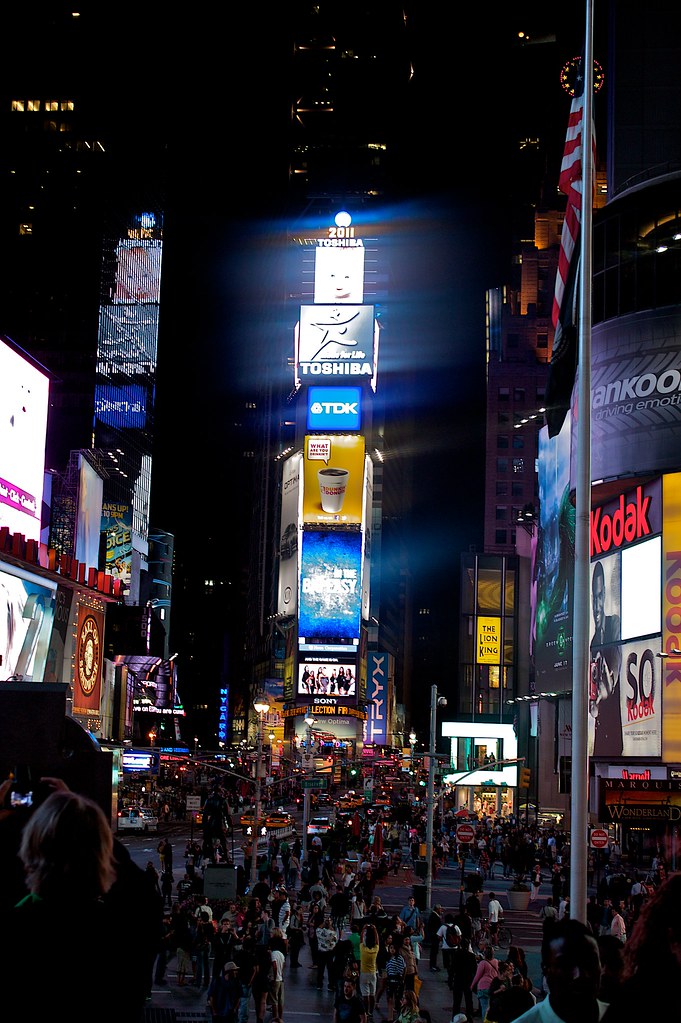
We left Two Little Red Hens and head back downtown to Time Square, this time by subway. We ended up having a little time to waste before seeing our last Broadway show, so we walked up a down Broadway and 7th Ave, then climbed up the bleachers at Duffy Square and did the best thing you can do in Time Square...people watch.


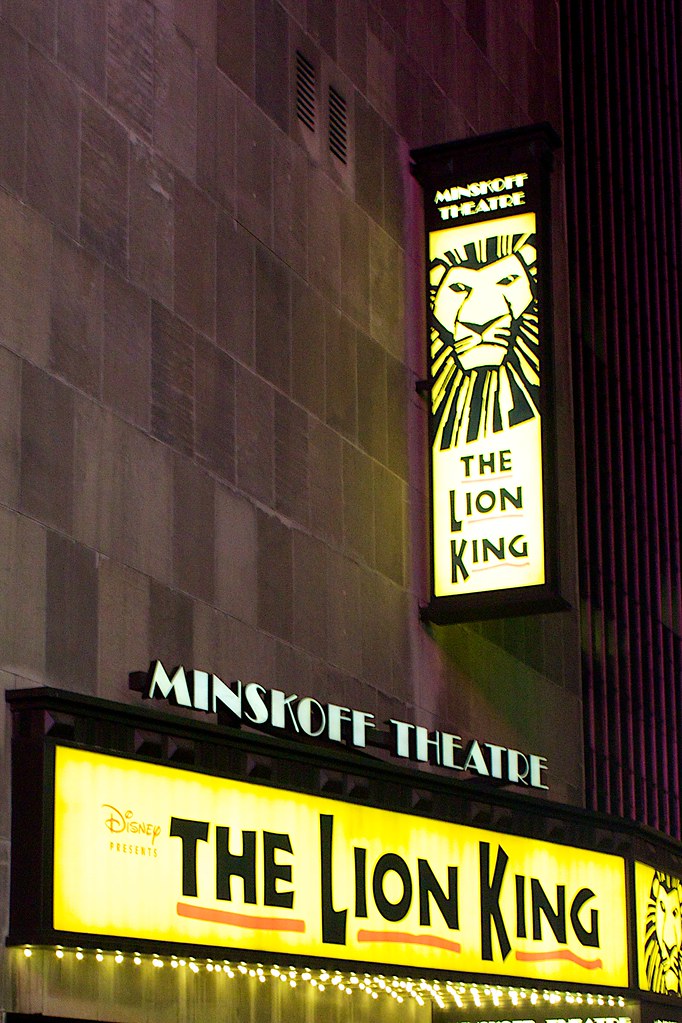
45 minutes before show time we headed over to the Minskoff Theatre to see the Broadway show I had been waiting to see for so long, The Lion King. I had heard amazing reviews about the Lion King and always wanted to take my kids to New York to see it, and now here we were, in New York and finally seeing The Lion King...Wah-Wah. What a disappointment. Maybe I expected too much, but I didn't like it at all, it was boring, weird, and annoying. (Zazu and Rafiki were the worst.) If I didn't pay so much for the tickets I would have probably left at intermission. Boo!
`

We left the theater around 11:30pm and walked back to our hotel just as it started to rain. By the next morning we were leaving New York in a full blow storm. As we sat at the airport waiting for the weather to clear, we were already talking about our next trip back.

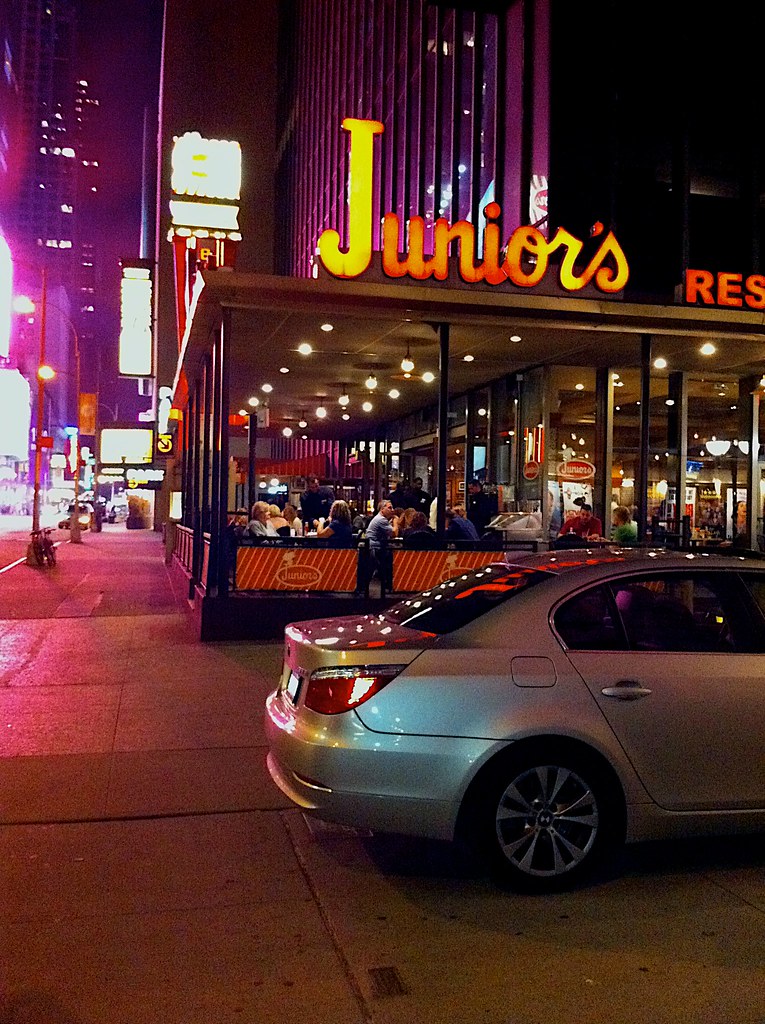
I went to New York expecting not to like it, not only did I like it I loved it. When I do go back (New York is expensive, I will have to save some money for quite awhile.) here are a few things I would like to do; SoHo, see more of Brooklyn, NBC Tour, Hayden Planetarium, Coney Island, Gray Line Bus Tour, Night Tour of Statue of Liberty, more time at the Metropolitan Museum, eat at Sant Ambrosa, Doughnut Plant, Lulu Bakery, Chickalicious, Balthazar, Juniors, Daisy May, Stand, Max Brenner, E.A.T, Baked,  Katz Deli, Hill Country Fried Chicken, Lady M Confections,  Macaron Cafe, Bubby's Pie Company, Momofuku Milk Bar, Francois Payard Bakery, The Chocolate Room, Takahachi Baker, and the list continues to grow. I ♥ New York!


*  Tip - Bring a warm jacket to the theater, they keep it freezing inside.
             If you only have time for 1 museum go to the Metropolitan Museum

* Cost - Norma's: 2 Chocolate Decadence French Toast & 2 Orange Juices = $83.68 (20% tip)
             Waffles & Dinges: A Waffle with Ice Cream & Chocolate =$7.00
             Two Little Red Hens: Lemon cupcake, Peanut Butter Fudge Cupcake & Carrot Cake
            Cupcake =$10.75

LinkWithin

Related Posts with Thumbnails